How to create a new document template in the app
Creating your own templates saves you a lot of time when repeatedly generating contracts, amendments, or other documents. Let's take a look at how to do it – from the first click to setting up smart fields.
Step 1: Starting template creation
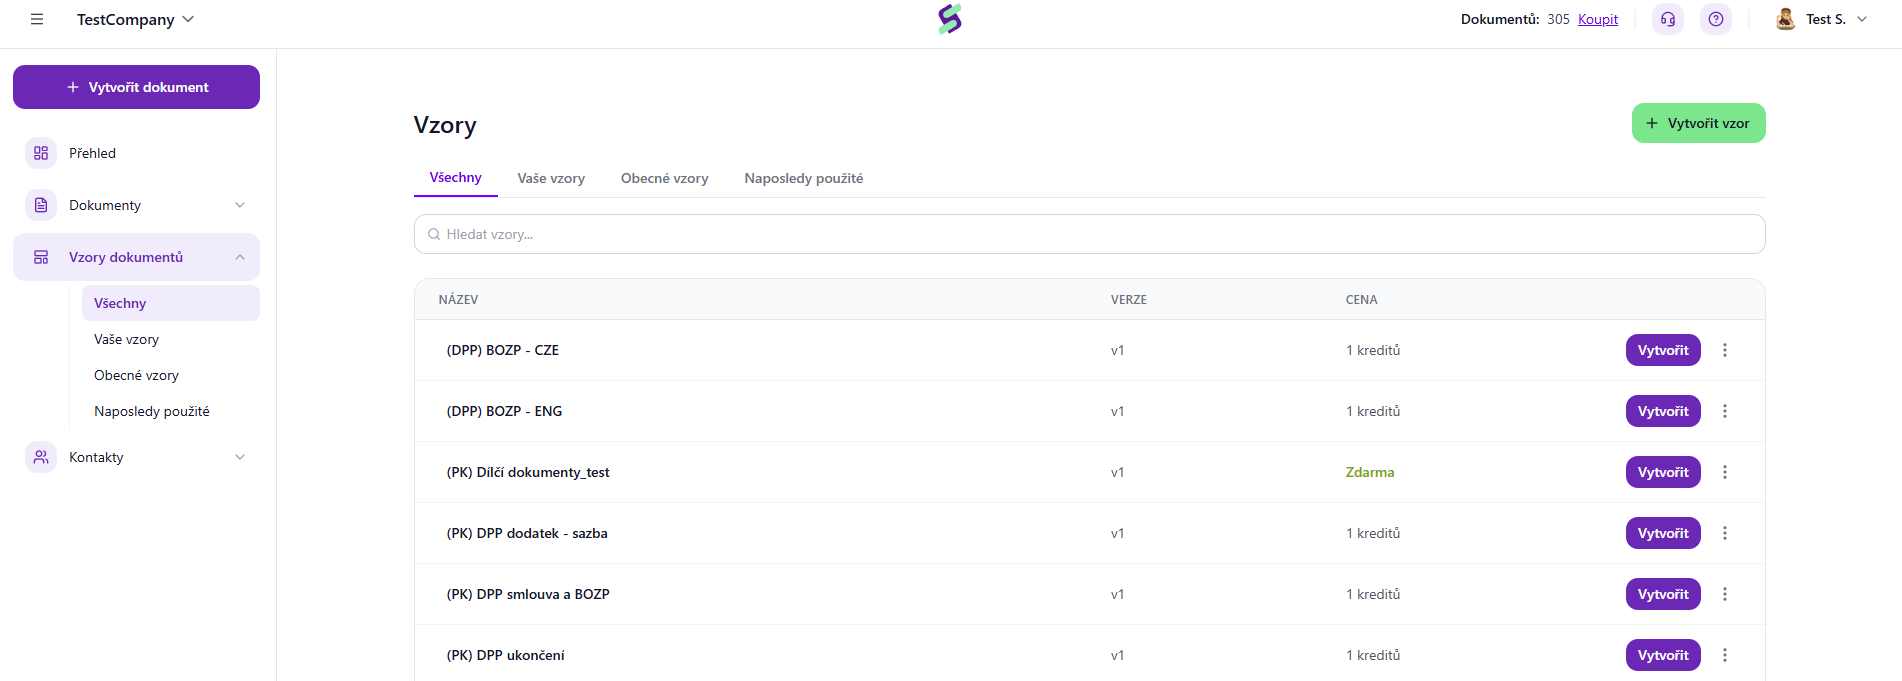
Everything begins on the main dashboard in the Document templates section.
Look at the top right corner of the screen.
Click the green + Create template button.
Step 2: Working in the editor (New template)
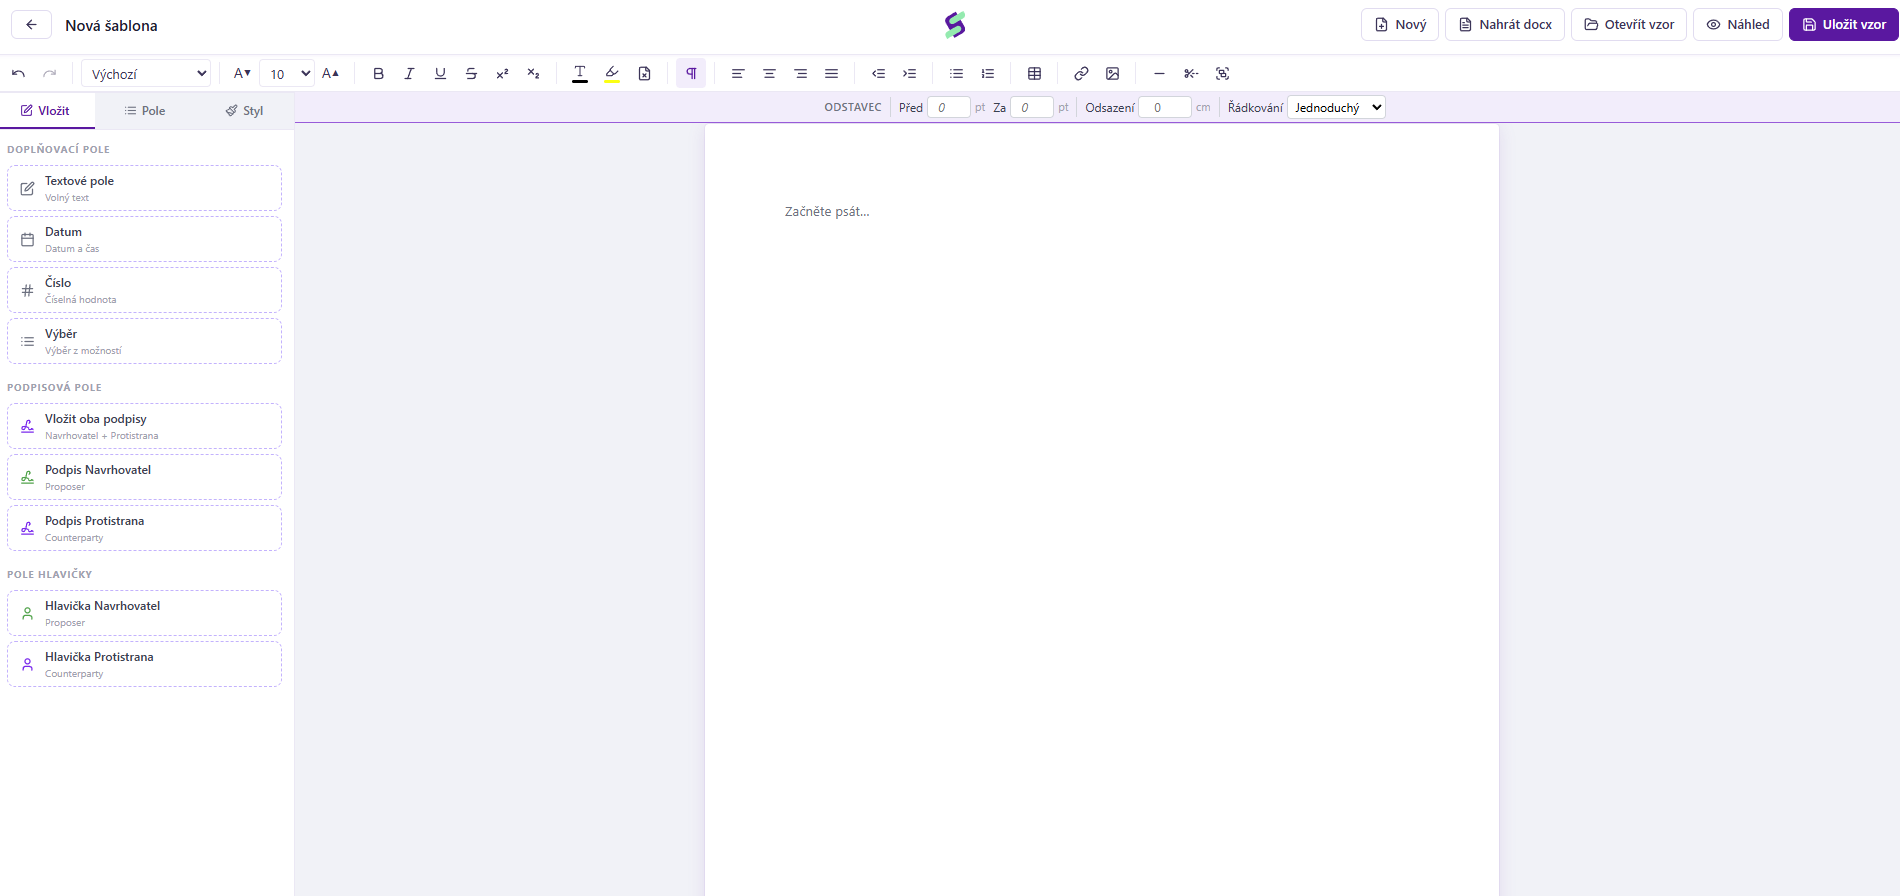
After clicking, the built-in editor opens, where you can assemble your template. You have two main options for how to get started with the text:
Write from scratch: You can start typing your own text directly onto the blank page (where it says "Start typing...").
Upload a finished document: If you already have a contract prepared on your computer, click the Upload docx button in the top bar and simply import the file.
Guide to the on-screen controls
The editor is divided into several sections that make your work easier:
1. Top control bar
At the top you'll find text formatting tools (font selection, size, bold, alignment, bullet points, etc.) as well as important system buttons in the top right corner:
New: Clears your work in progress and starts over.
Open template: Lets you load an already existing template.
Preview: Shows you how the document will look in its final form.
Save template: Saves your finished template into the system so you can start using it.
2. Left panel: Interactive fields
The most important part of a template are the dynamic fields, which are filled in automatically or manually when the document is actually completed. Just click on them or drag them into the text:
Fill-in fields:
Text field: For inserting any text (e.g. name, address, specific arrangement).
Date: A field where you can select a specific date and time.
Number: For numeric values (e.g. amounts, company ID, personal ID number).
Selection: A drop-down list from which the user chooses one of the predefined options.
Signature fields:
Insert both signatures: Adds signature blocks for both the Sender and the Counterparty at once.
Sender signature / Counterparty signature: Lets you insert an electronic signature field for each party separately wherever you need it.
Header fields:
- Sender header / Counterparty header: Automatically pre-fills the identification details of the companies or persons (such as names, registered offices, etc.) registered in the system.
Step 3: Setting up interactive field details
When you insert a smart field into the document, a table with its detailed settings pops up. In this step you determine how the field will behave, who should fill it in, and what the end user will see in it.
Let's go through the individual items.
Common settings for all fields
Most elements share identical basic settings:
NAME (required): An internal name for the field, which you and the system use for orientation (e.g. "Contract signing date" or "Type of cooperation").
FIELD ID: A unique technical code (e.g.
date_1,options_1) that the system generates automatically and that you normally don't need to change. However, it is key for bulk campaign sending. This ID serves as the column header in the CSV file you import for the campaign. In practice, it works like this: in the first row of the CSV table you list this field ID, and in the rows below it you enter the specific values, which are then automatically filled into the documents.PLACEHOLDER: Hint text that the user sees greyed out inside the field until they start typing (e.g. "Select from the list..." or "DD.MM.YYYY").
DESCRIPTION: An optional field for more detailed instructions. If you need to clarify to the user exactly what to fill in, write it here.
PARTY: A crucial setting that determines who should fill in this field. By clicking, you choose either Sender (you) or Counterparty (your client/partner). Fields intended for the counterparty can also be filled in by the sender themselves if necessary.
Required field (checkbox): If you enable this box, the document cannot be signed/approved without this field being filled in.
Specific settings for the "Date", "Text field" and "Number" fields
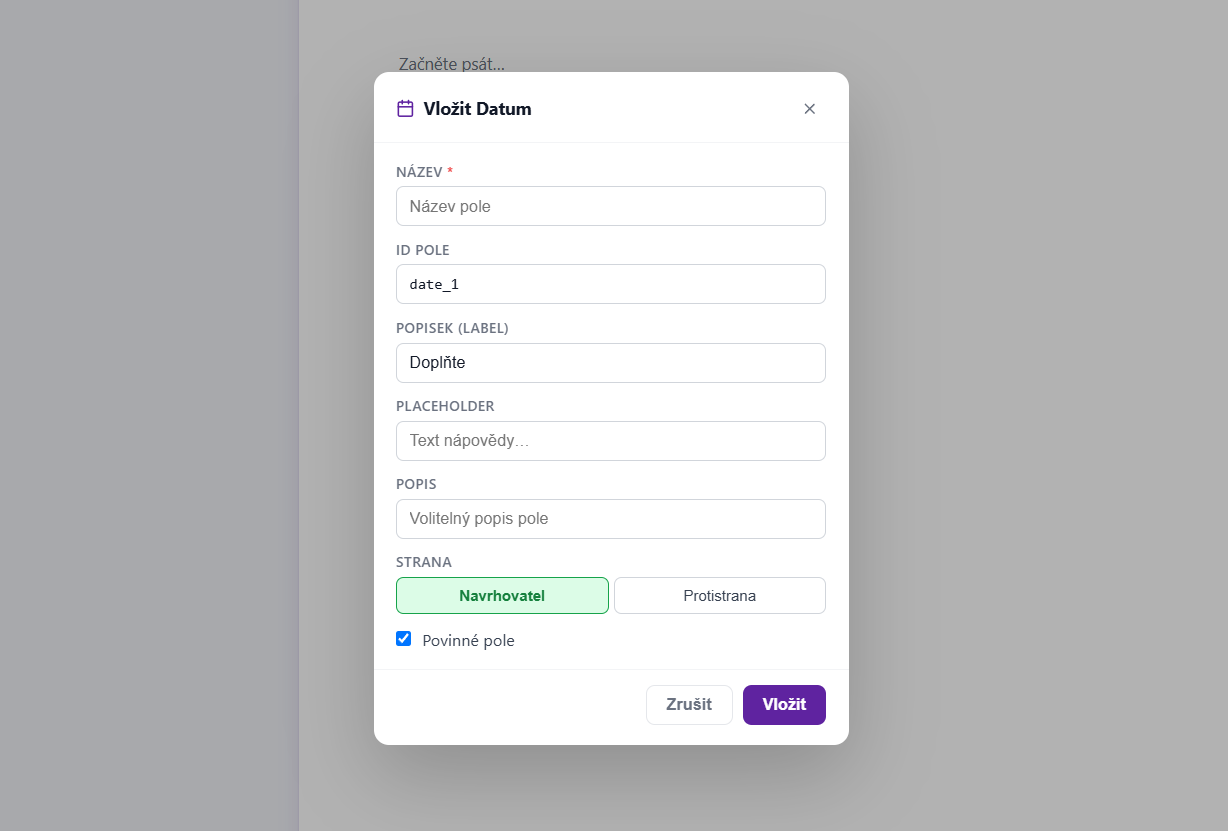
For Text field, Date and Number, you'll additionally find one useful detail:
- LABEL: Text that appears directly above the field itself in the fill-in wizard (e.g. you can change the default "Fill in" to "Enter the start date").
Specific settings for the "Insert selection" field
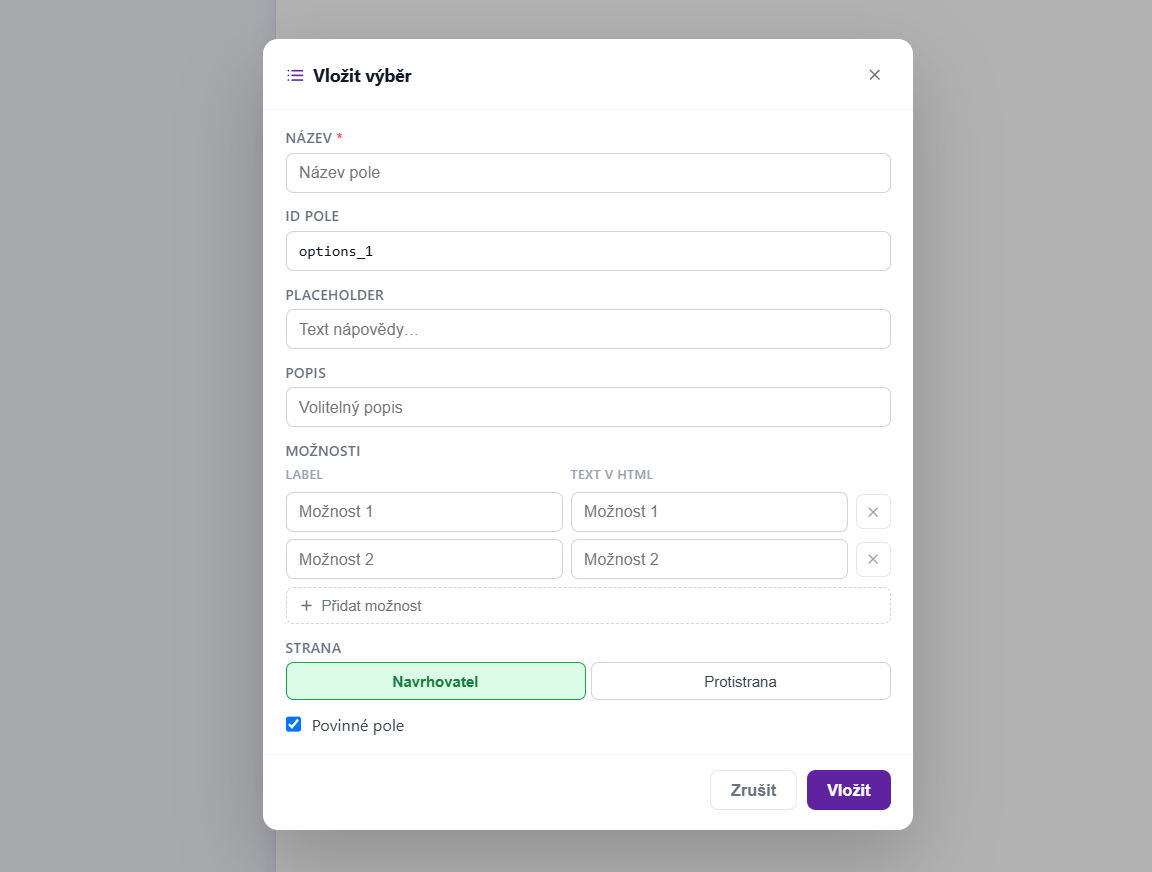
The selection field (a so-called dropdown / drop-down list) is used so that the user doesn't type text manually but instead chooses from the options you define.
OPTIONS: Here you define the items the user will be able to choose from.
LABEL: What the person filling in the document actually sees (e.g. "Indefinite period").
TEXT IN HTML: The value that is actually written into the resulting text of the document after selection (usually it matches the Label, but you can have formatted text here).
+ Add option: Click this button to add another row for a new variant.
Cross icon (X): Click the cross to delete the given option from the list.
Was this article helpful?
That’s Great!
Thank you for your feedback
Sorry! We couldn't be helpful
Thank you for your feedback
Feedback sent
We appreciate your effort and will try to fix the article