Overview
SIGNI allows you to invite additional team members to a workspace so they can collaborate on preparing and signing documents. Each team member can be assigned specific permissions that determine what they can see and do in the given workspace.
Adding a team member to a workspace
To invite a new team member, follow these steps:
- Open Workspace settings.
- Go to the Team section.
- Enter the email address of the person you want to invite.
- Set additional options (if available under your license):
- Signing group – lets you set up different groups (e.g., Managers). In signing scenarios, you can then define that a given document should be signed by one person from the Managers group. It doesn't matter which one – simply whoever gets to it first.
- Signature footer
- Confirm the invitation by clicking Add team member.
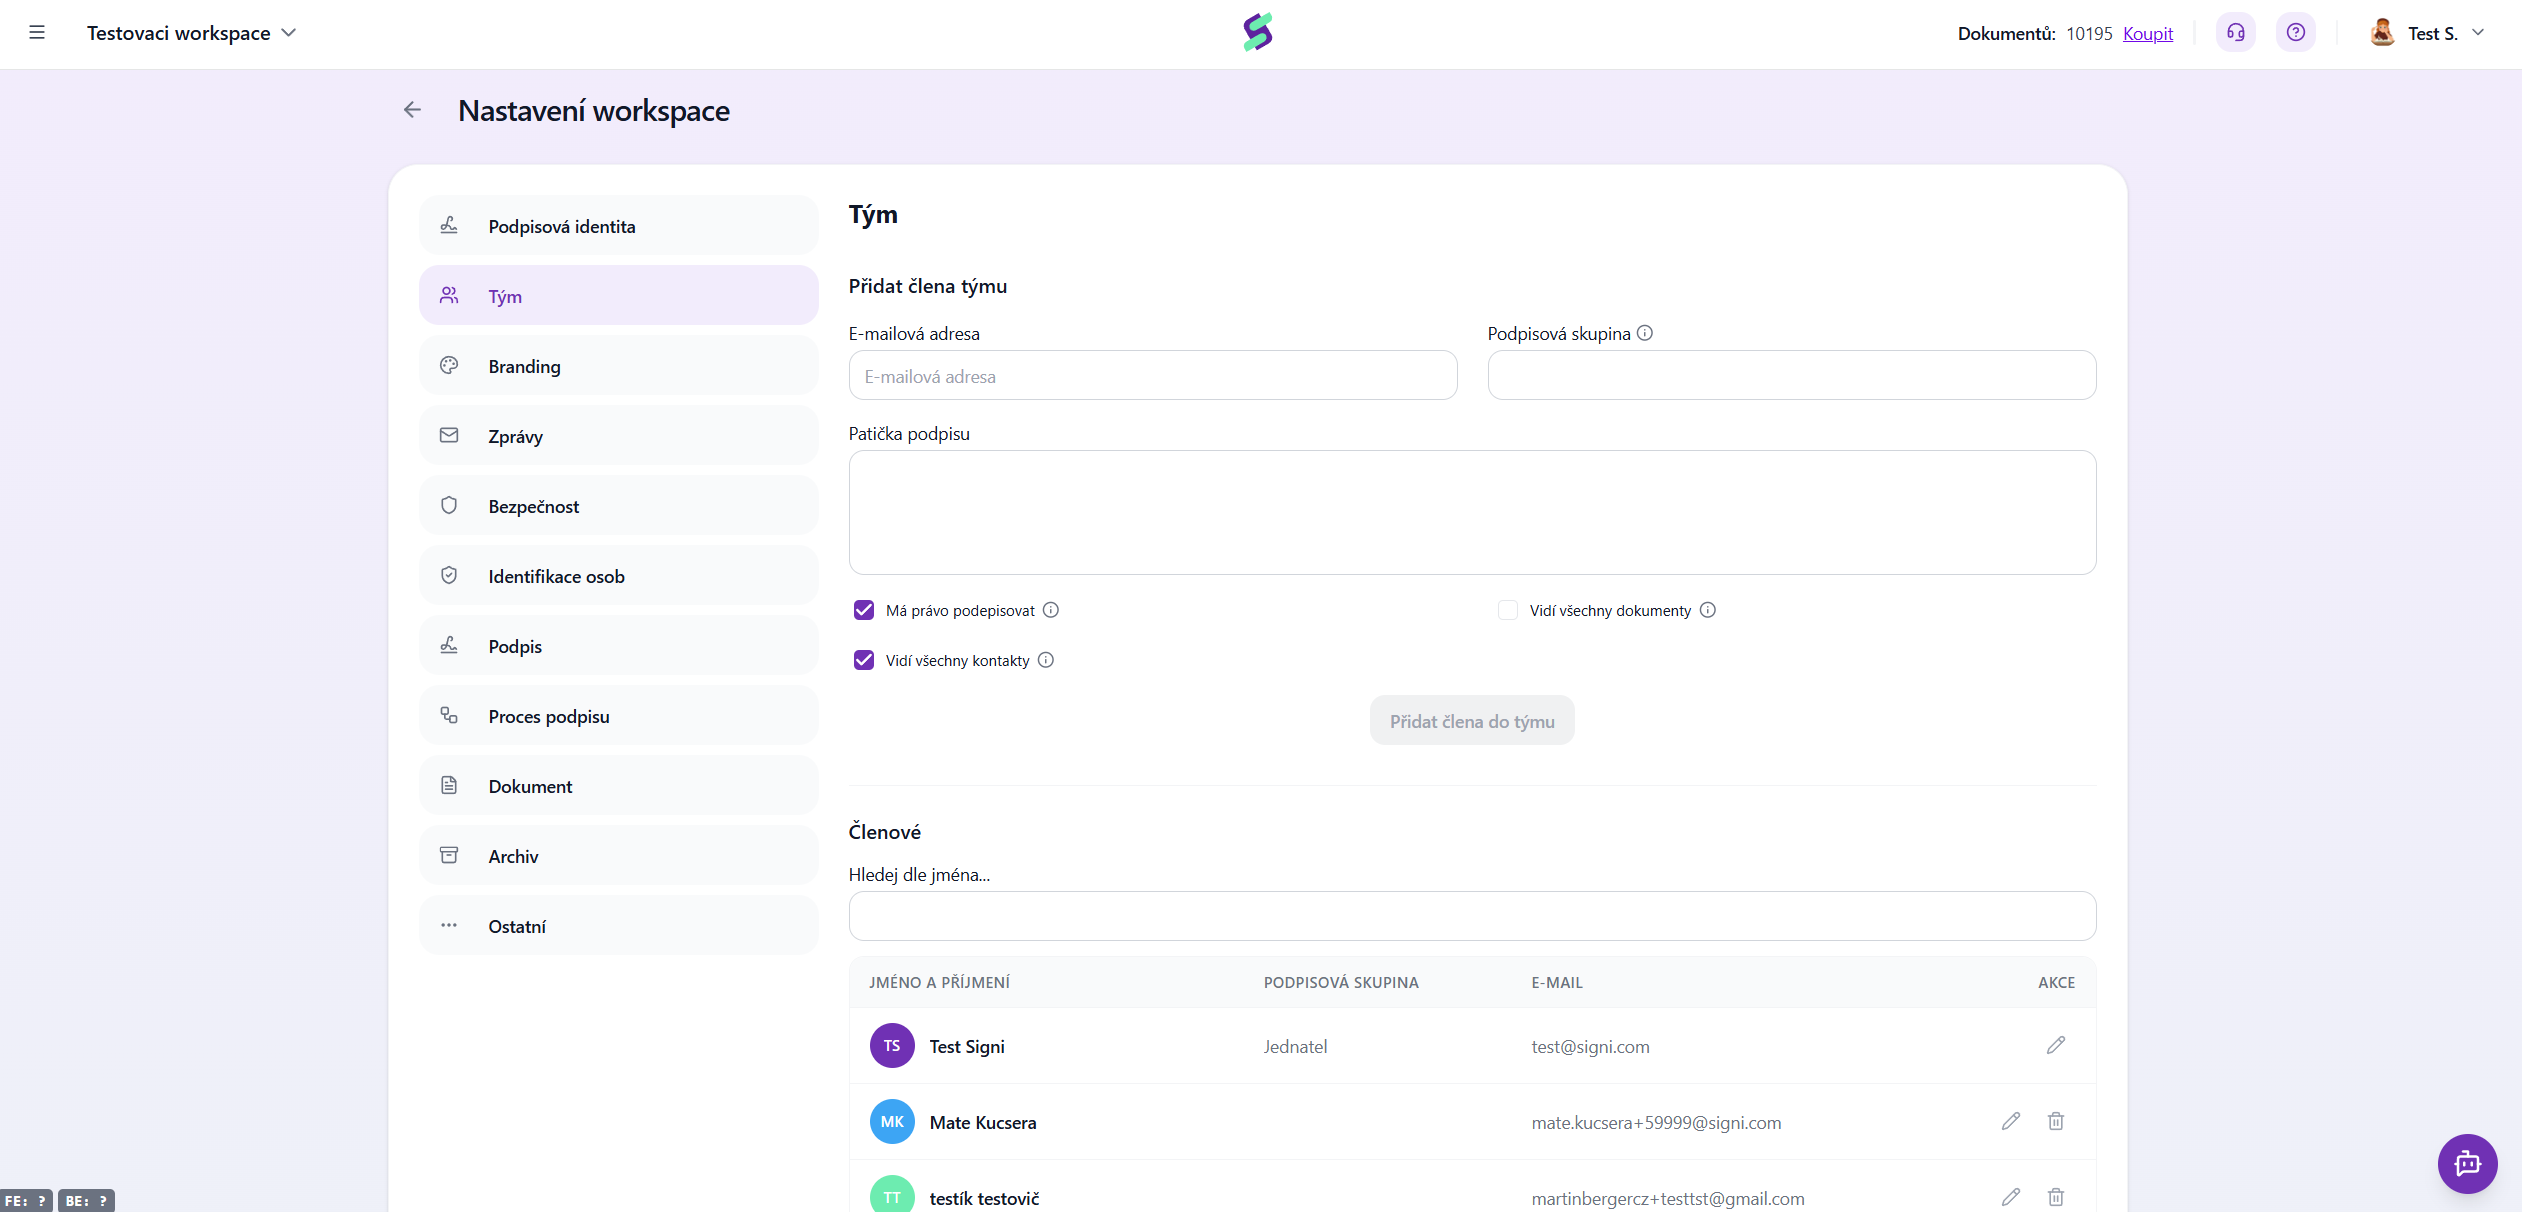
Explanation of fields when inviting
- Email address This email address will serve as the user's login email.
- Signing group Used to configure the method and order of signing. This feature is described in a separate article (currently in preparation).
- Signature footer Text that appears below a specific person's signature on signed documents.
User roles and permissions
You can assign the following permissions to each team member:
Has the right to sign
- The user can upload documents for signing.
- The user can act as a proposer with signing authority.
- If this permission is not checked, the user can prepare documents but cannot sign them on behalf of the organization.
Sees all documents
- When enabled, the user can see all documents in the given workspace.
- When disabled, they only see documents they created or signed themselves.
Sees all contacts
- By default, the user only sees contacts they created themselves.
- When this permission is enabled, they see all contacts in the workspace (e.g., names and email addresses of counterparties).
Accepting a team invitation
After receiving an invitation:
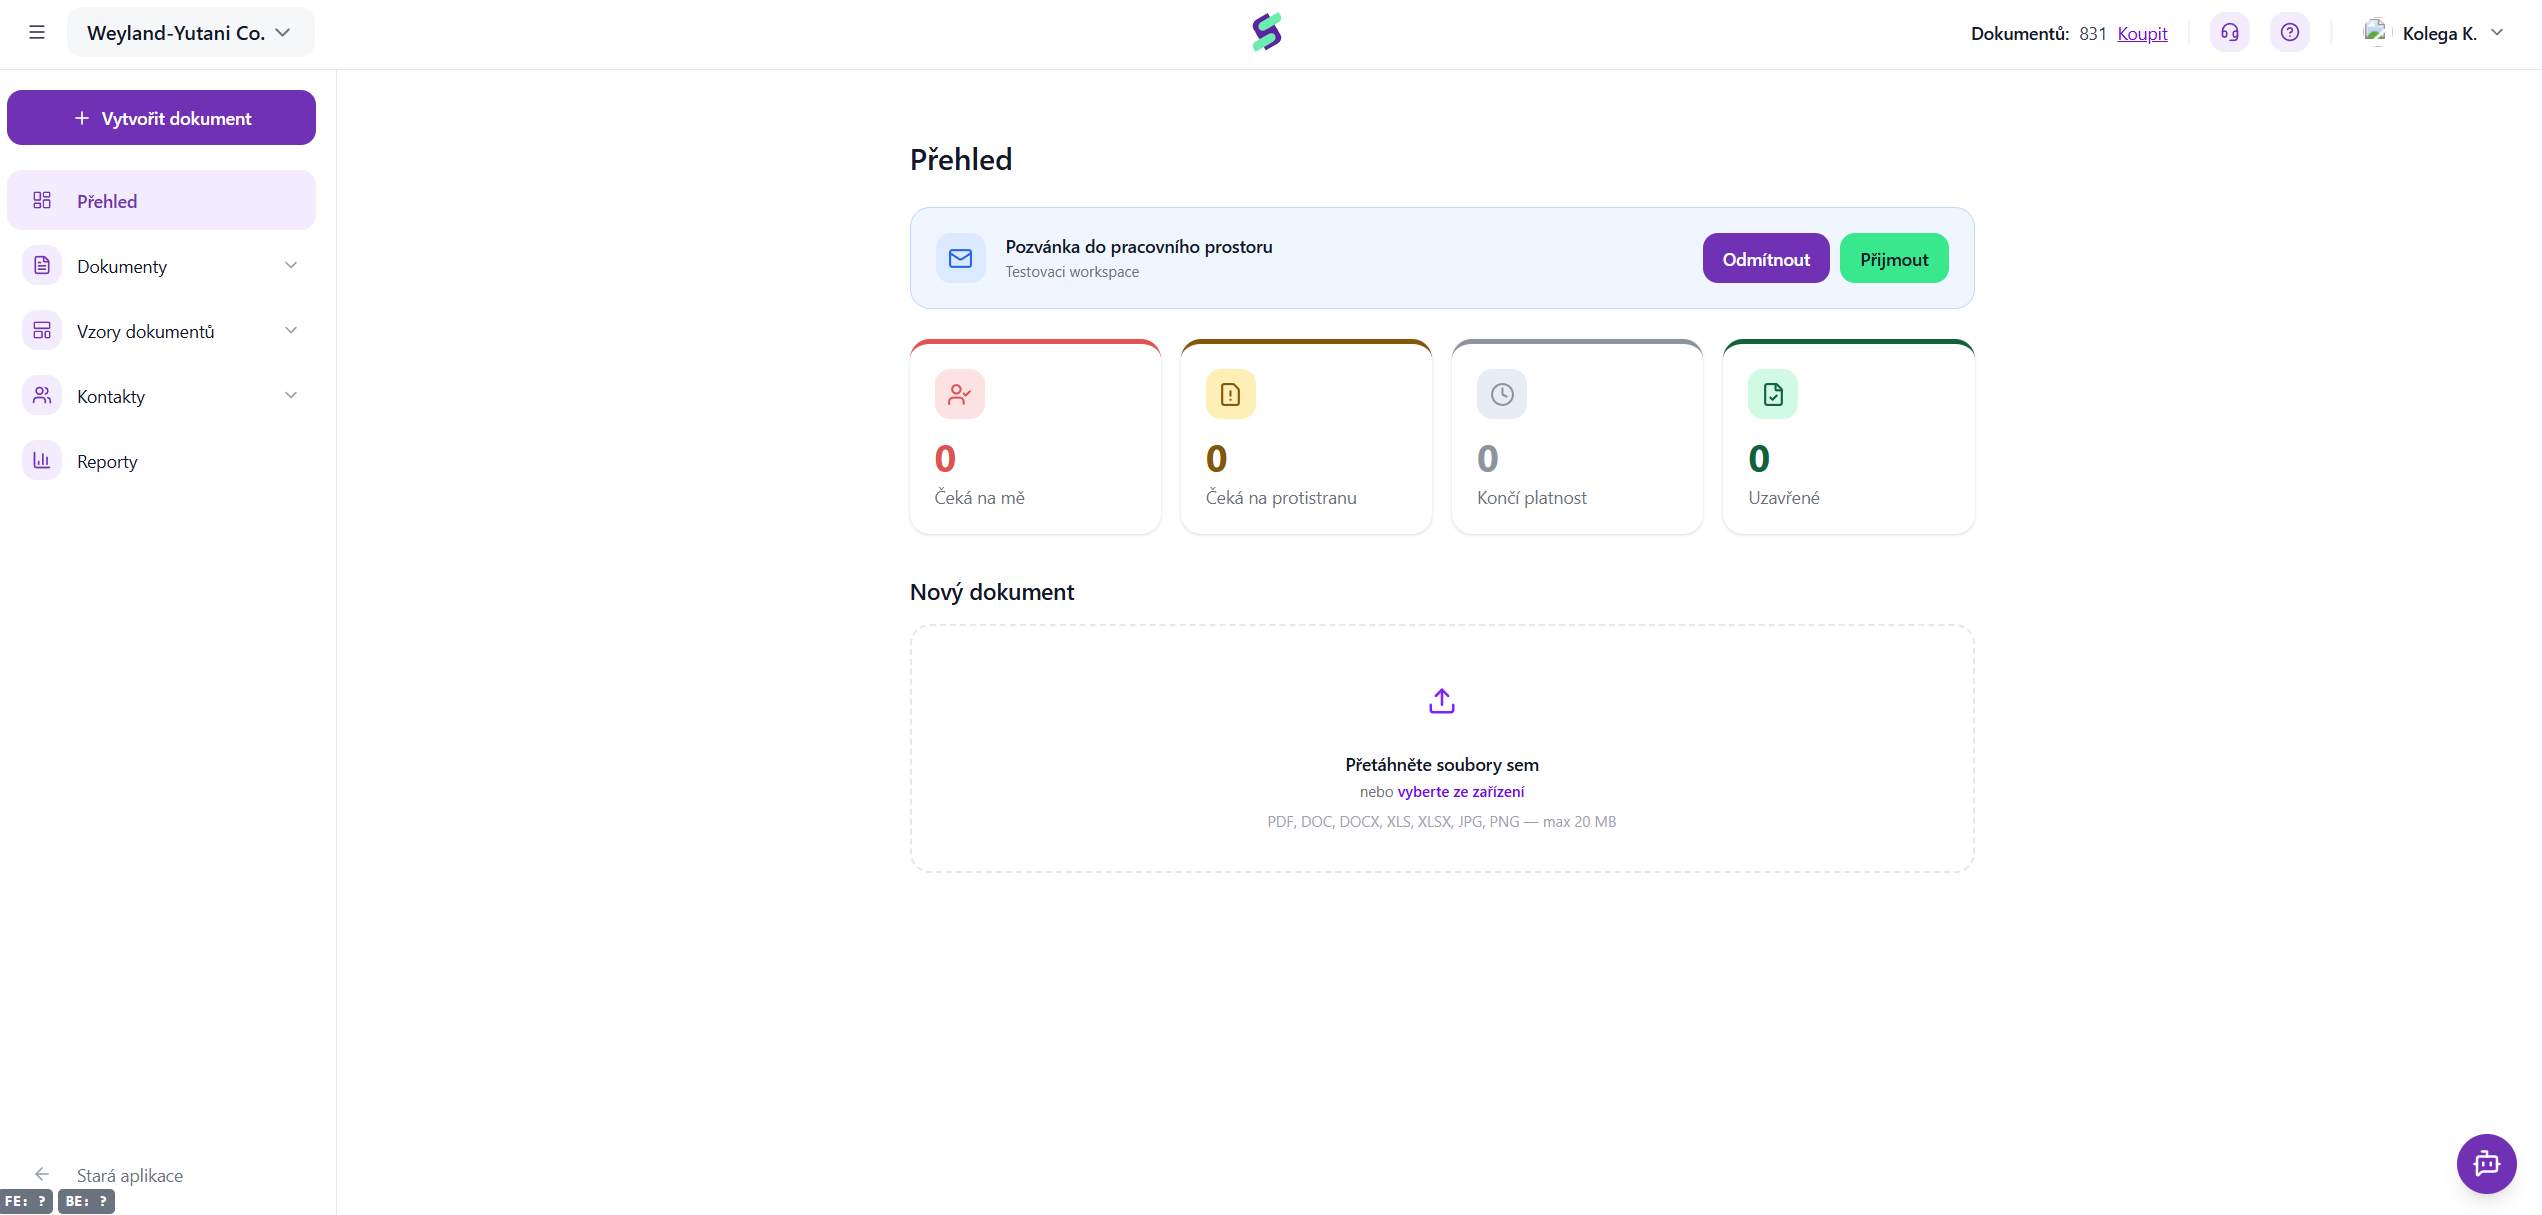
- If the invited person does not yet have a SIGNI account, they must first register and then accept the invitation.
- If they already have a SIGNI account, after logging in they simply confirm the invitation on the app's main screen.
Managing team members
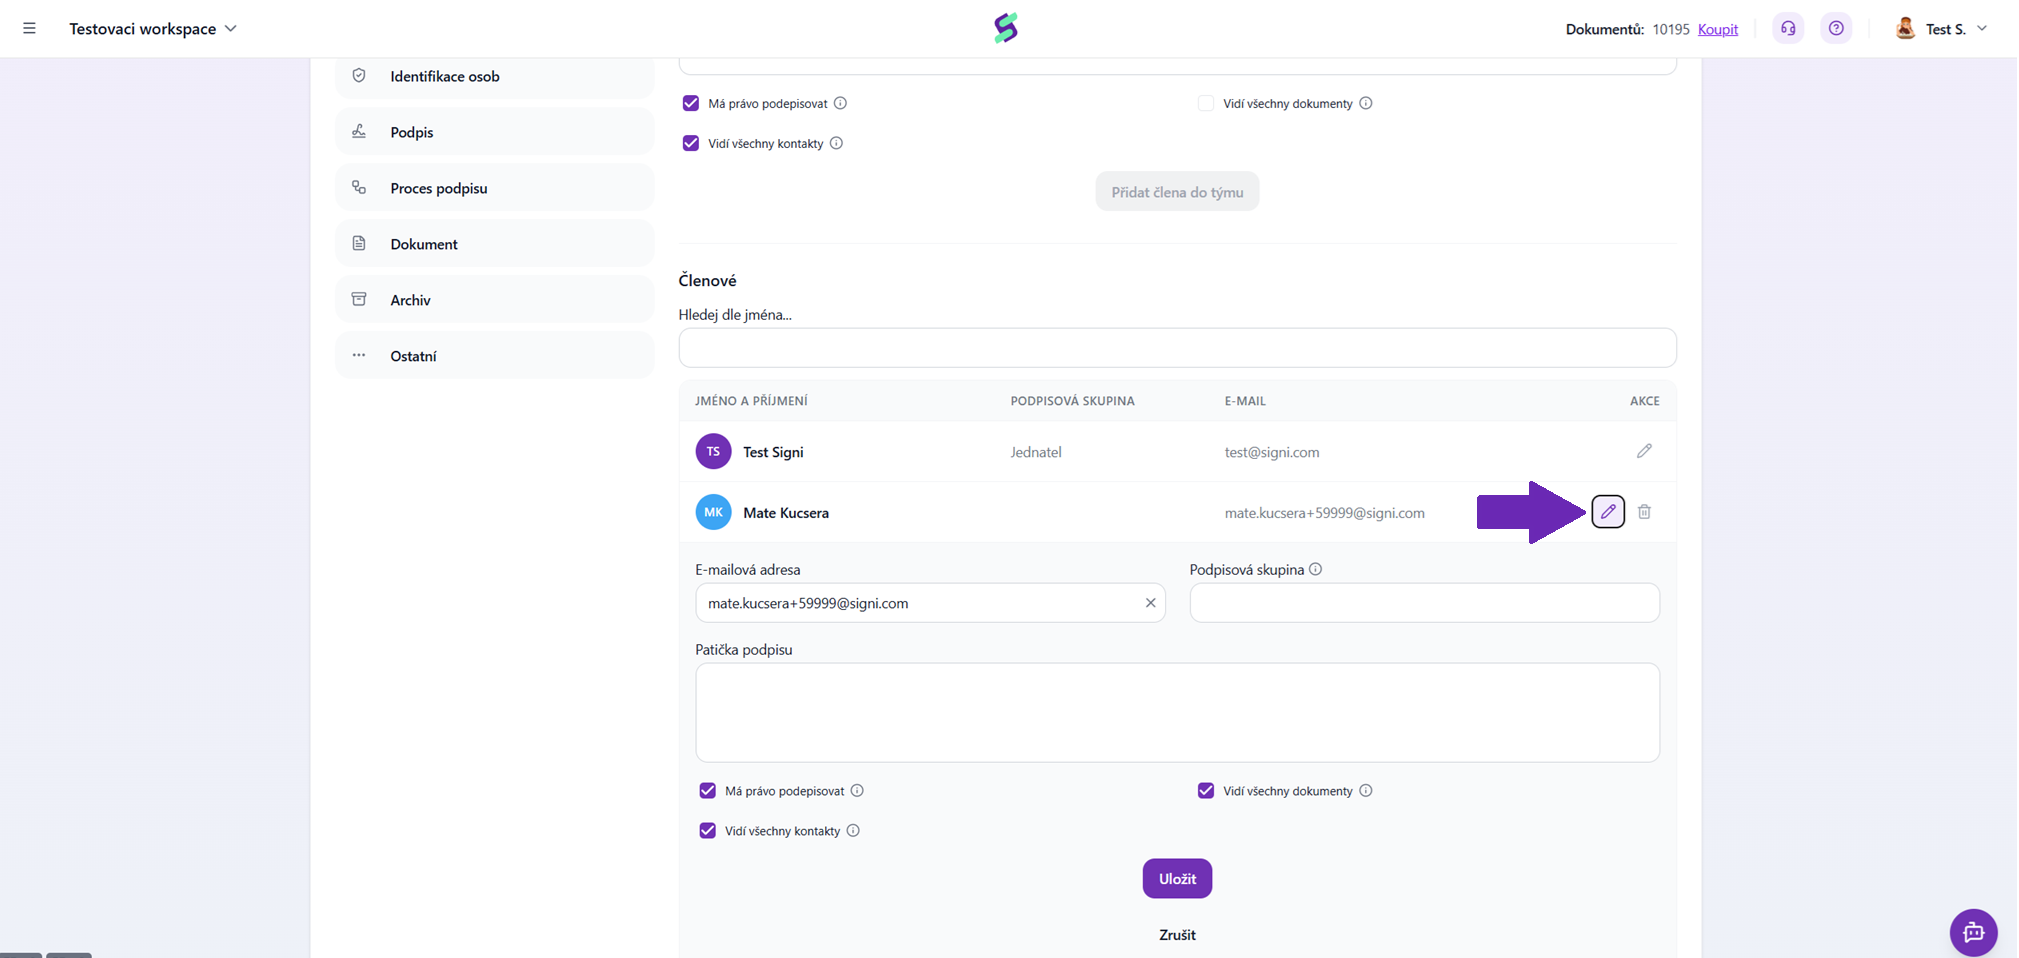
Editing permissions
- Click the pencil icon next to the team member's name.
- Adjust the permissions as needed.
- Confirm the changes by clicking Save.
Removing a team member
- Click the trash icon next to the team member's name.
- The user account remains active, but:
- the user will no longer be a member of the team/workspace,
- they will not be able to use credits from the main account.
Administrators and working with multiple workspaces
- An administrator or account owner is automatically a team member in all workspaces created under that account.
- If you want colleagues to work in multiple workspaces, you need to:
- send them an invitation to each workspace separately,
- set their permissions in each team individually.
- A user can also be a member of a workspace created by another administrator, if they receive and accept the invitation.
Was this article helpful?
That’s Great!
Thank you for your feedback
Sorry! We couldn't be helpful
Thank you for your feedback
Feedback sent
We appreciate your effort and will try to fix the article