Besides uploading a file, you can sign documents in Signi that were created from a prepared template.
The advantage of templates is that in Signi you enter — or a connected application provides — only the necessary data, and Signi creates the document and also ensures it gets signed or approved.
The steps for using templates are as follows:
- Choosing a template to sign
- Setting the signing scenario
- Filling in data into the template
- Attaching another document to the set
- Sending documents for signature
This is a paid feature, see the price list; to enable it, contact us at sales@signi.com
Choosing a template to sign
In the application you have both general templates that are available to all users, and you can also have us insert the document templates you currently use into your workspace.
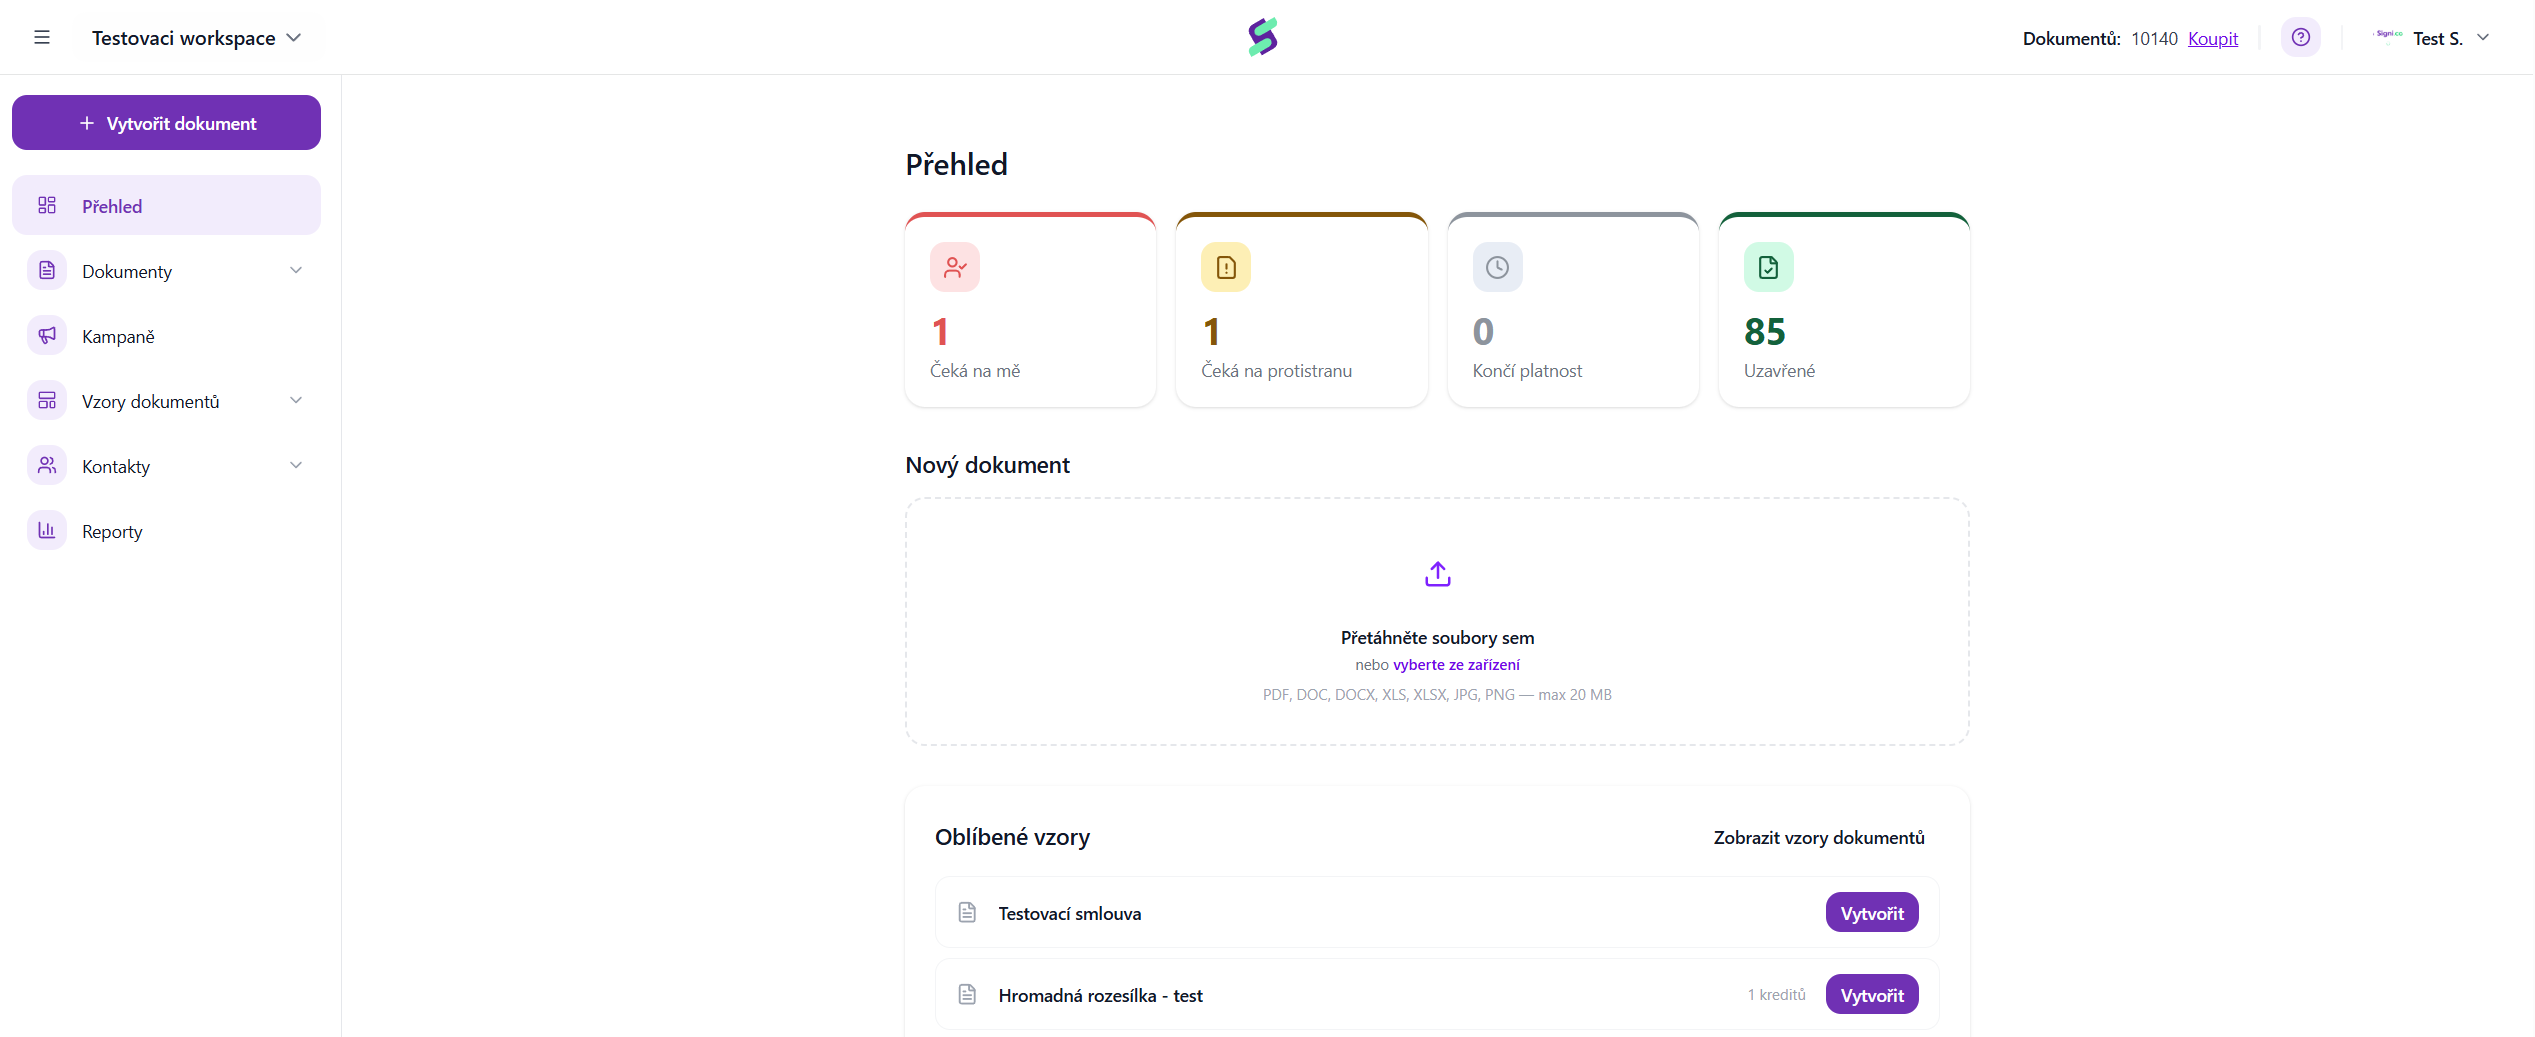
On the main screen you can see the most frequently used templates of your documents under the name Favorite templates. If you need a template other than the last used one, click the Show document templates button.
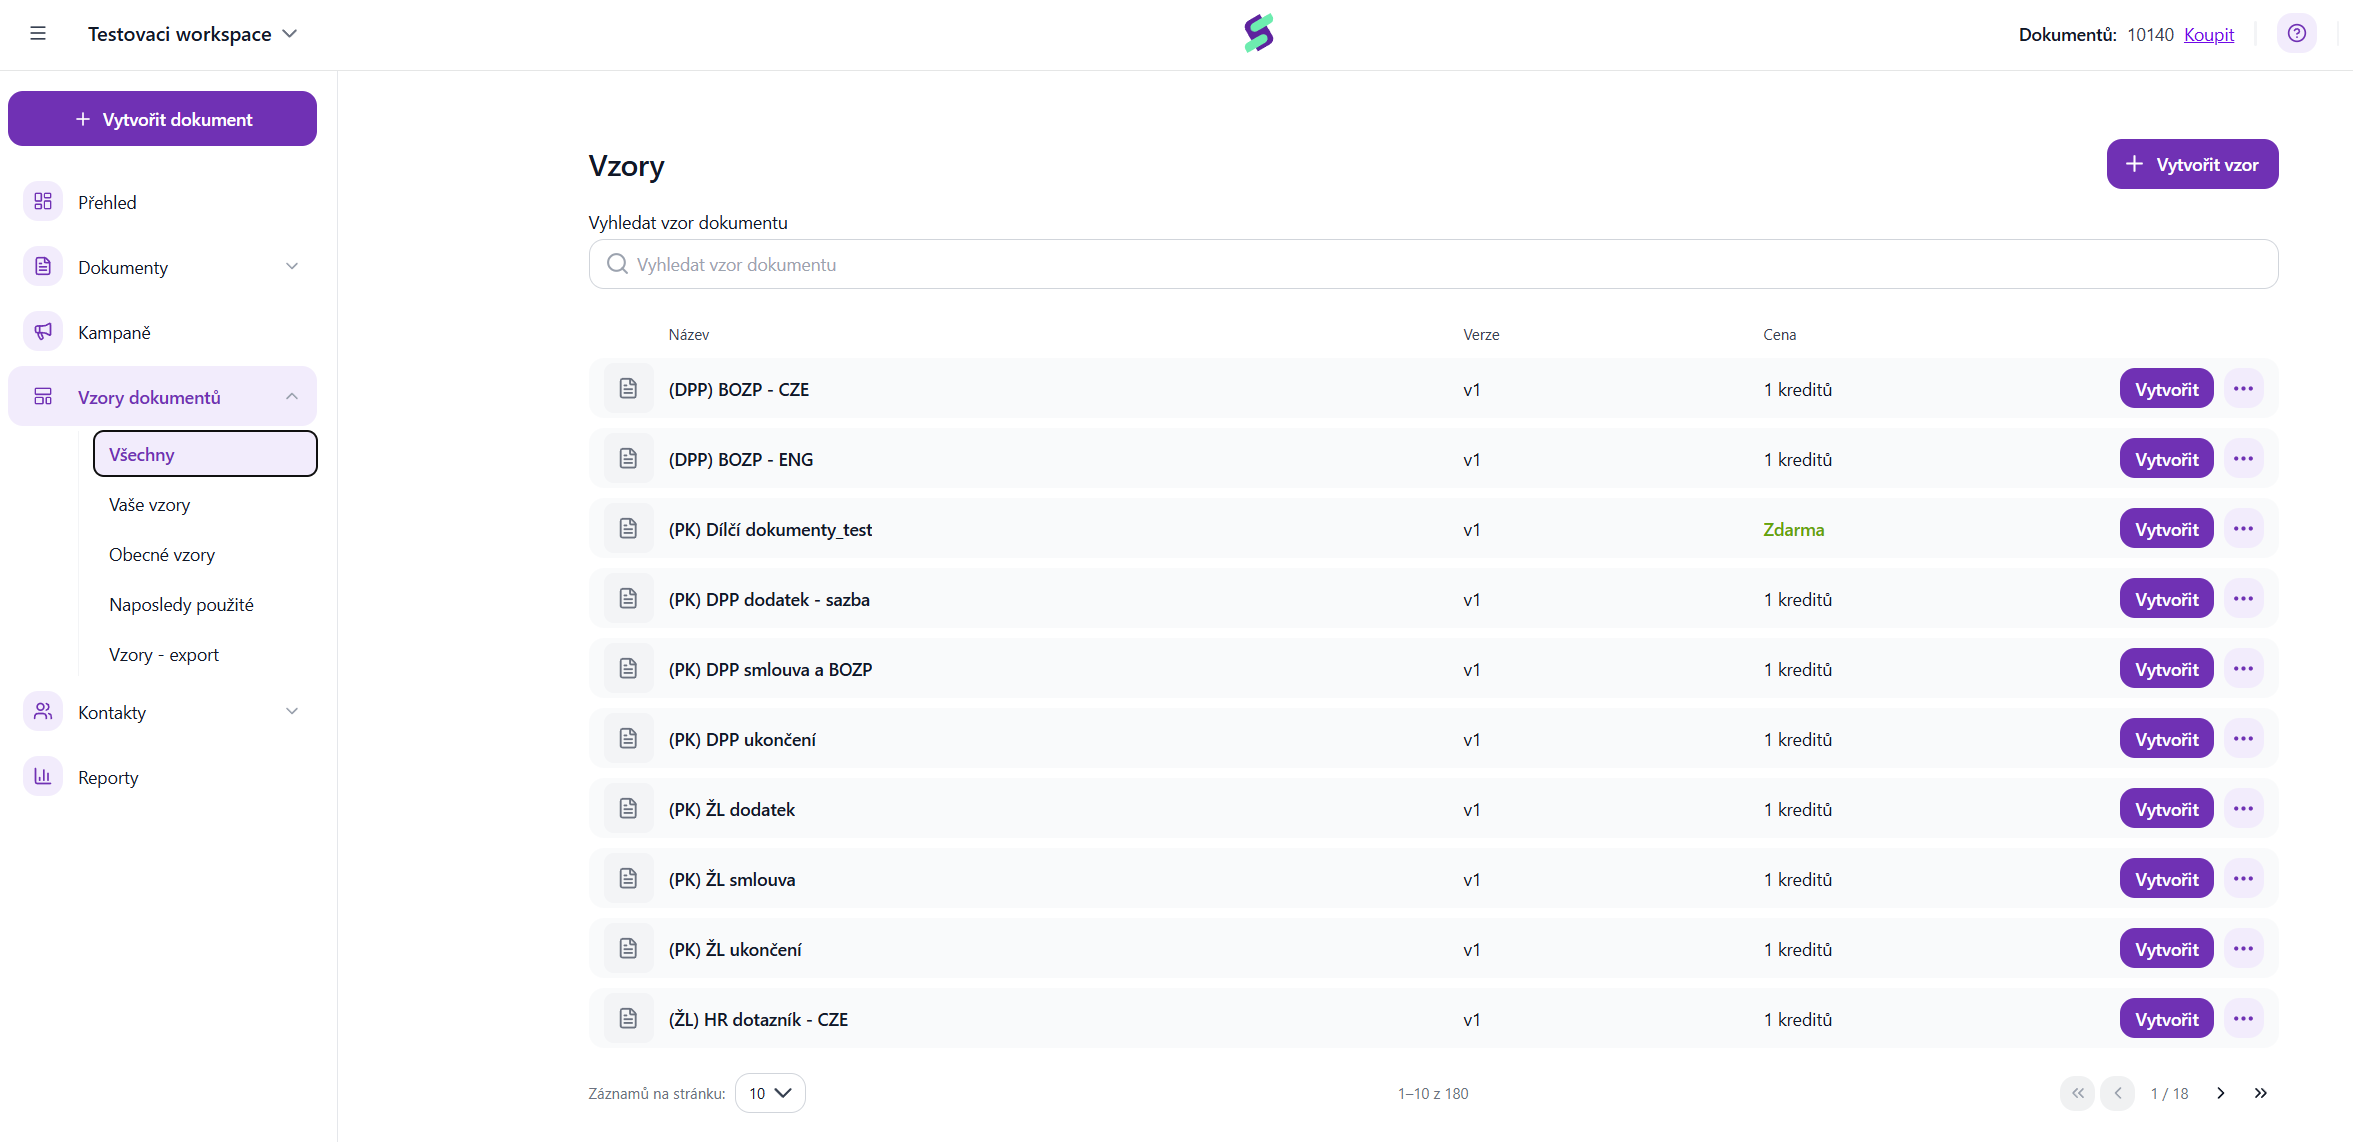
If you have your own company document templates inserted into Signi, you will find them in the Your templates tab. All other templates can be viewed in the menu under the All tab.
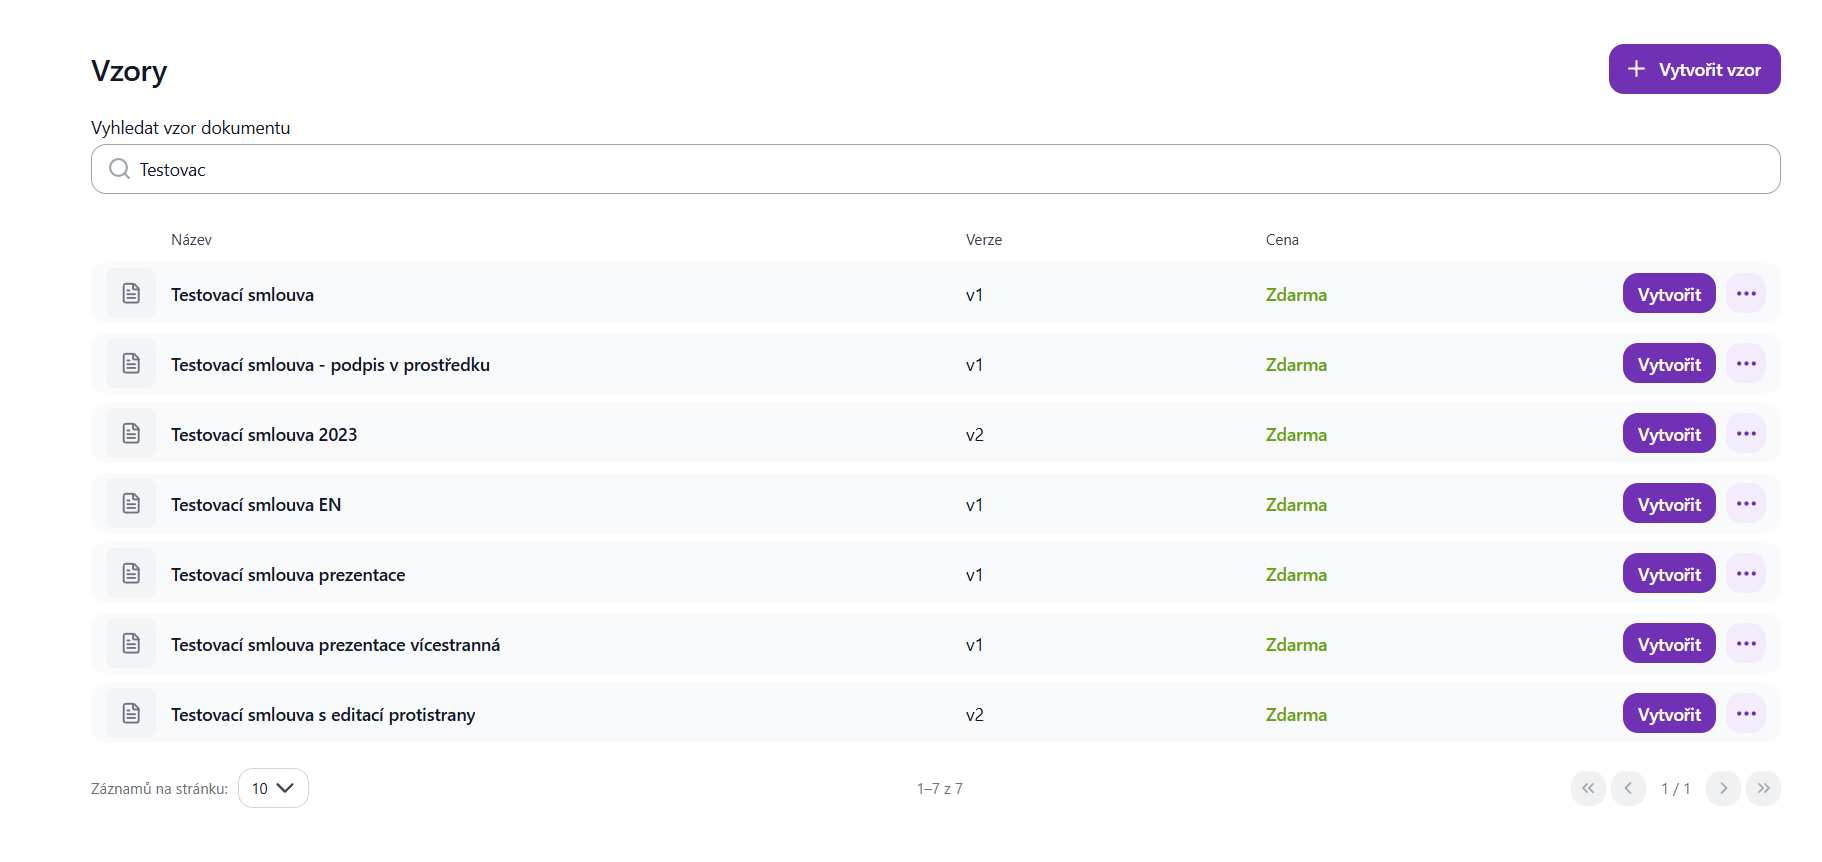
Templates can be searched by name. If you want to conclude, for example, a Consulting Services Agreement, enter part of the name into the search field and, after finding the document, click Create.
In the next step, the application takes you to the signing scenario page, where you specify who will sign when, or approve, remotely identify themselves, and so on.
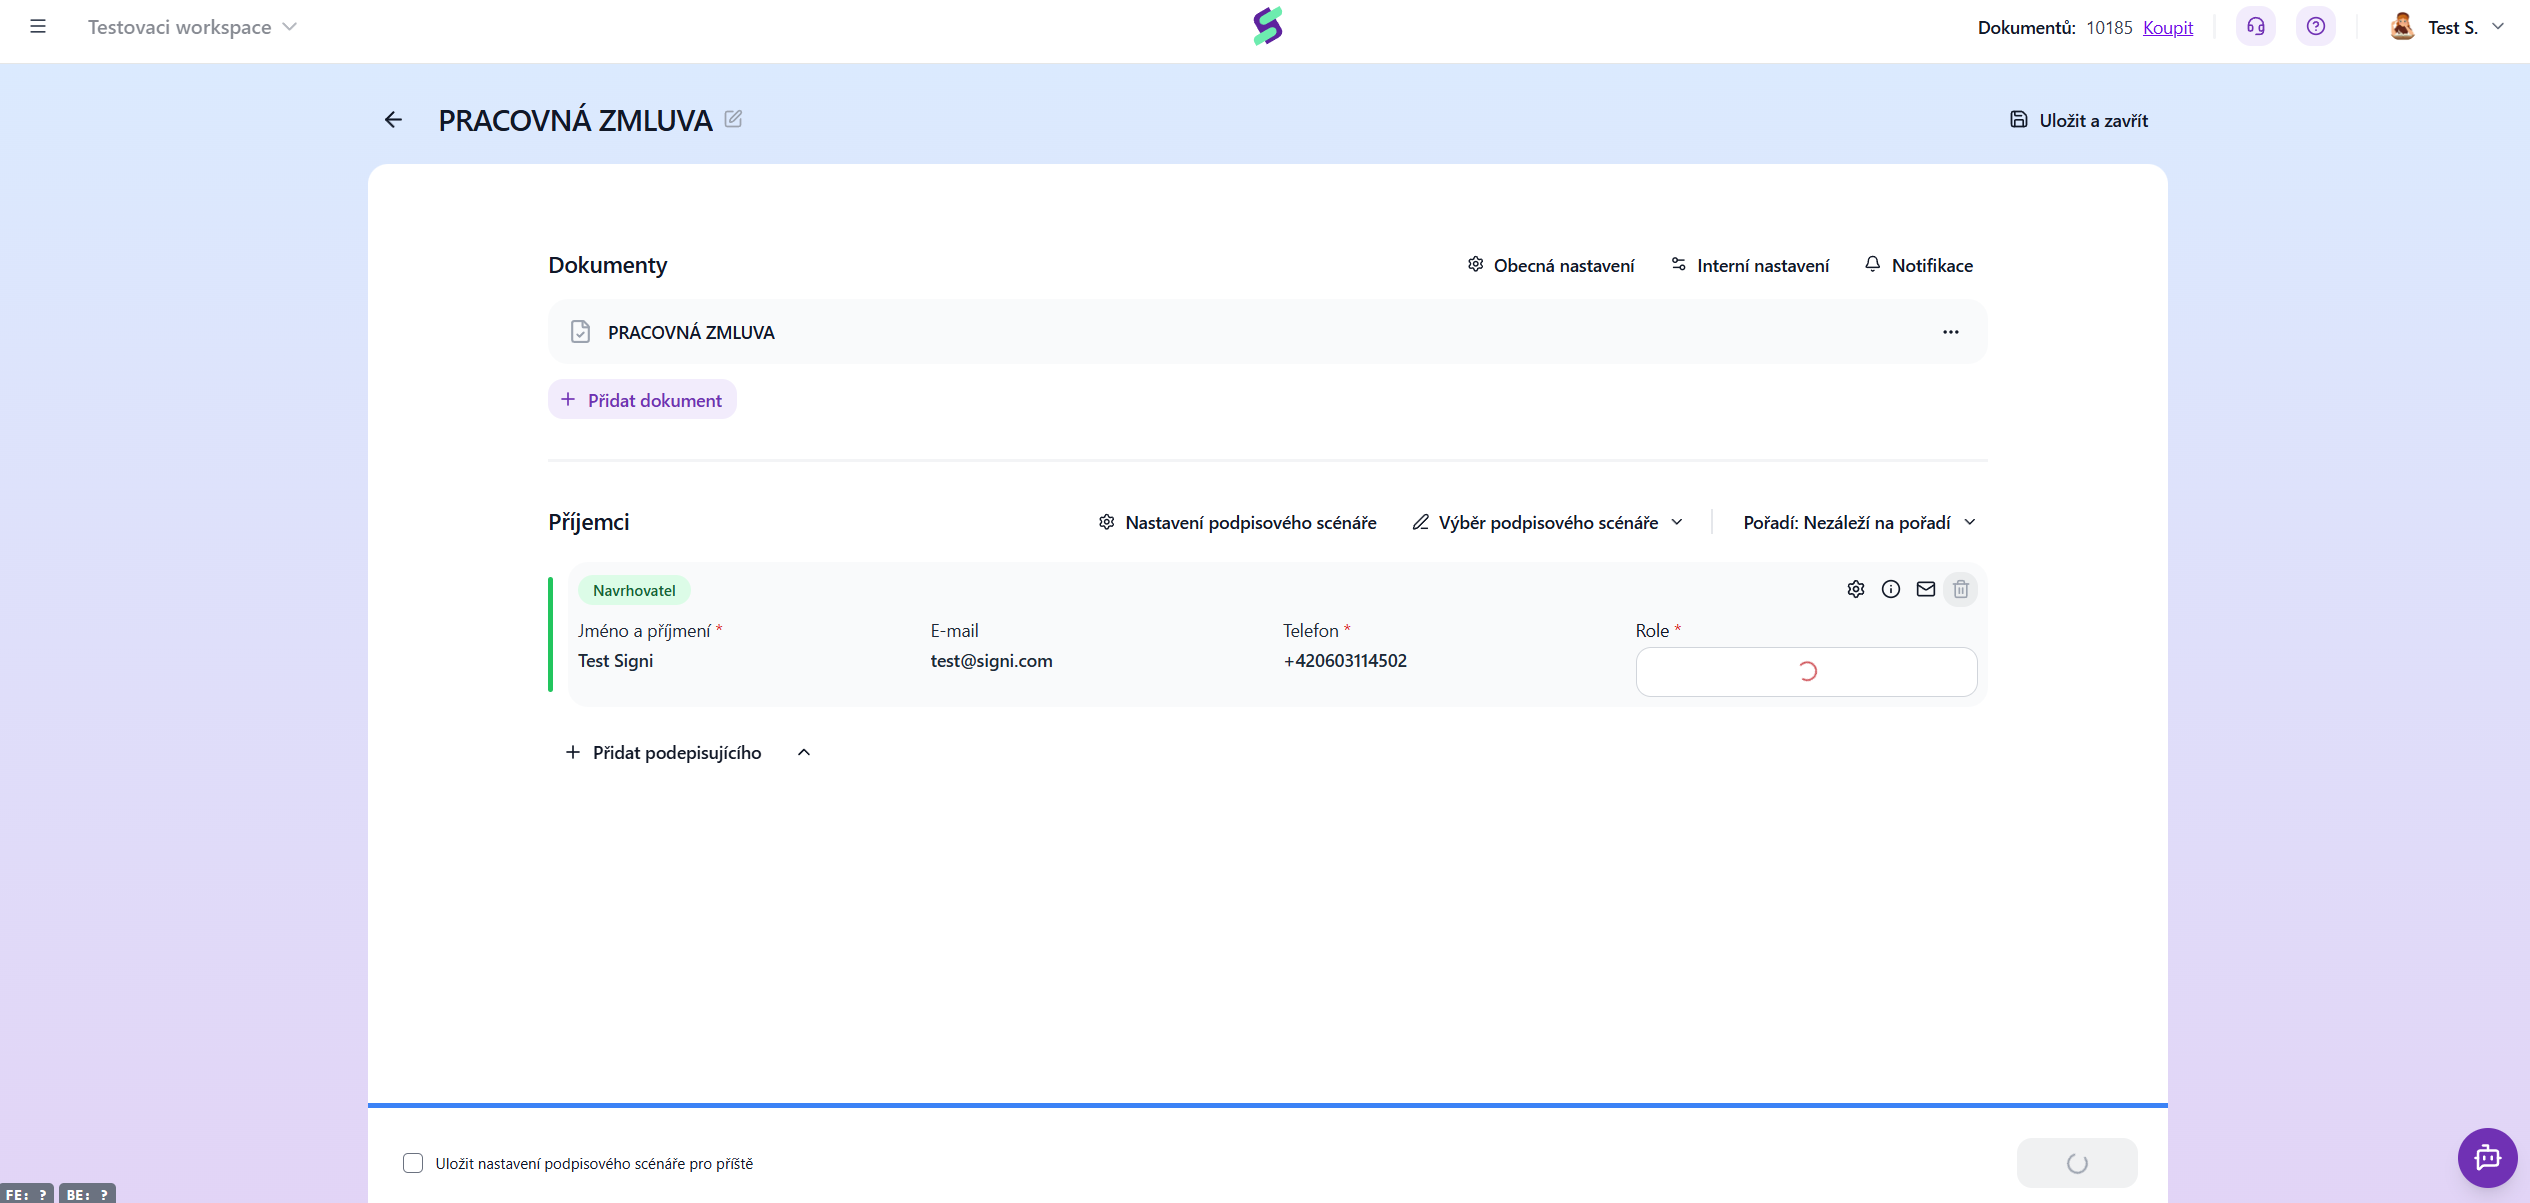
The General settings button:
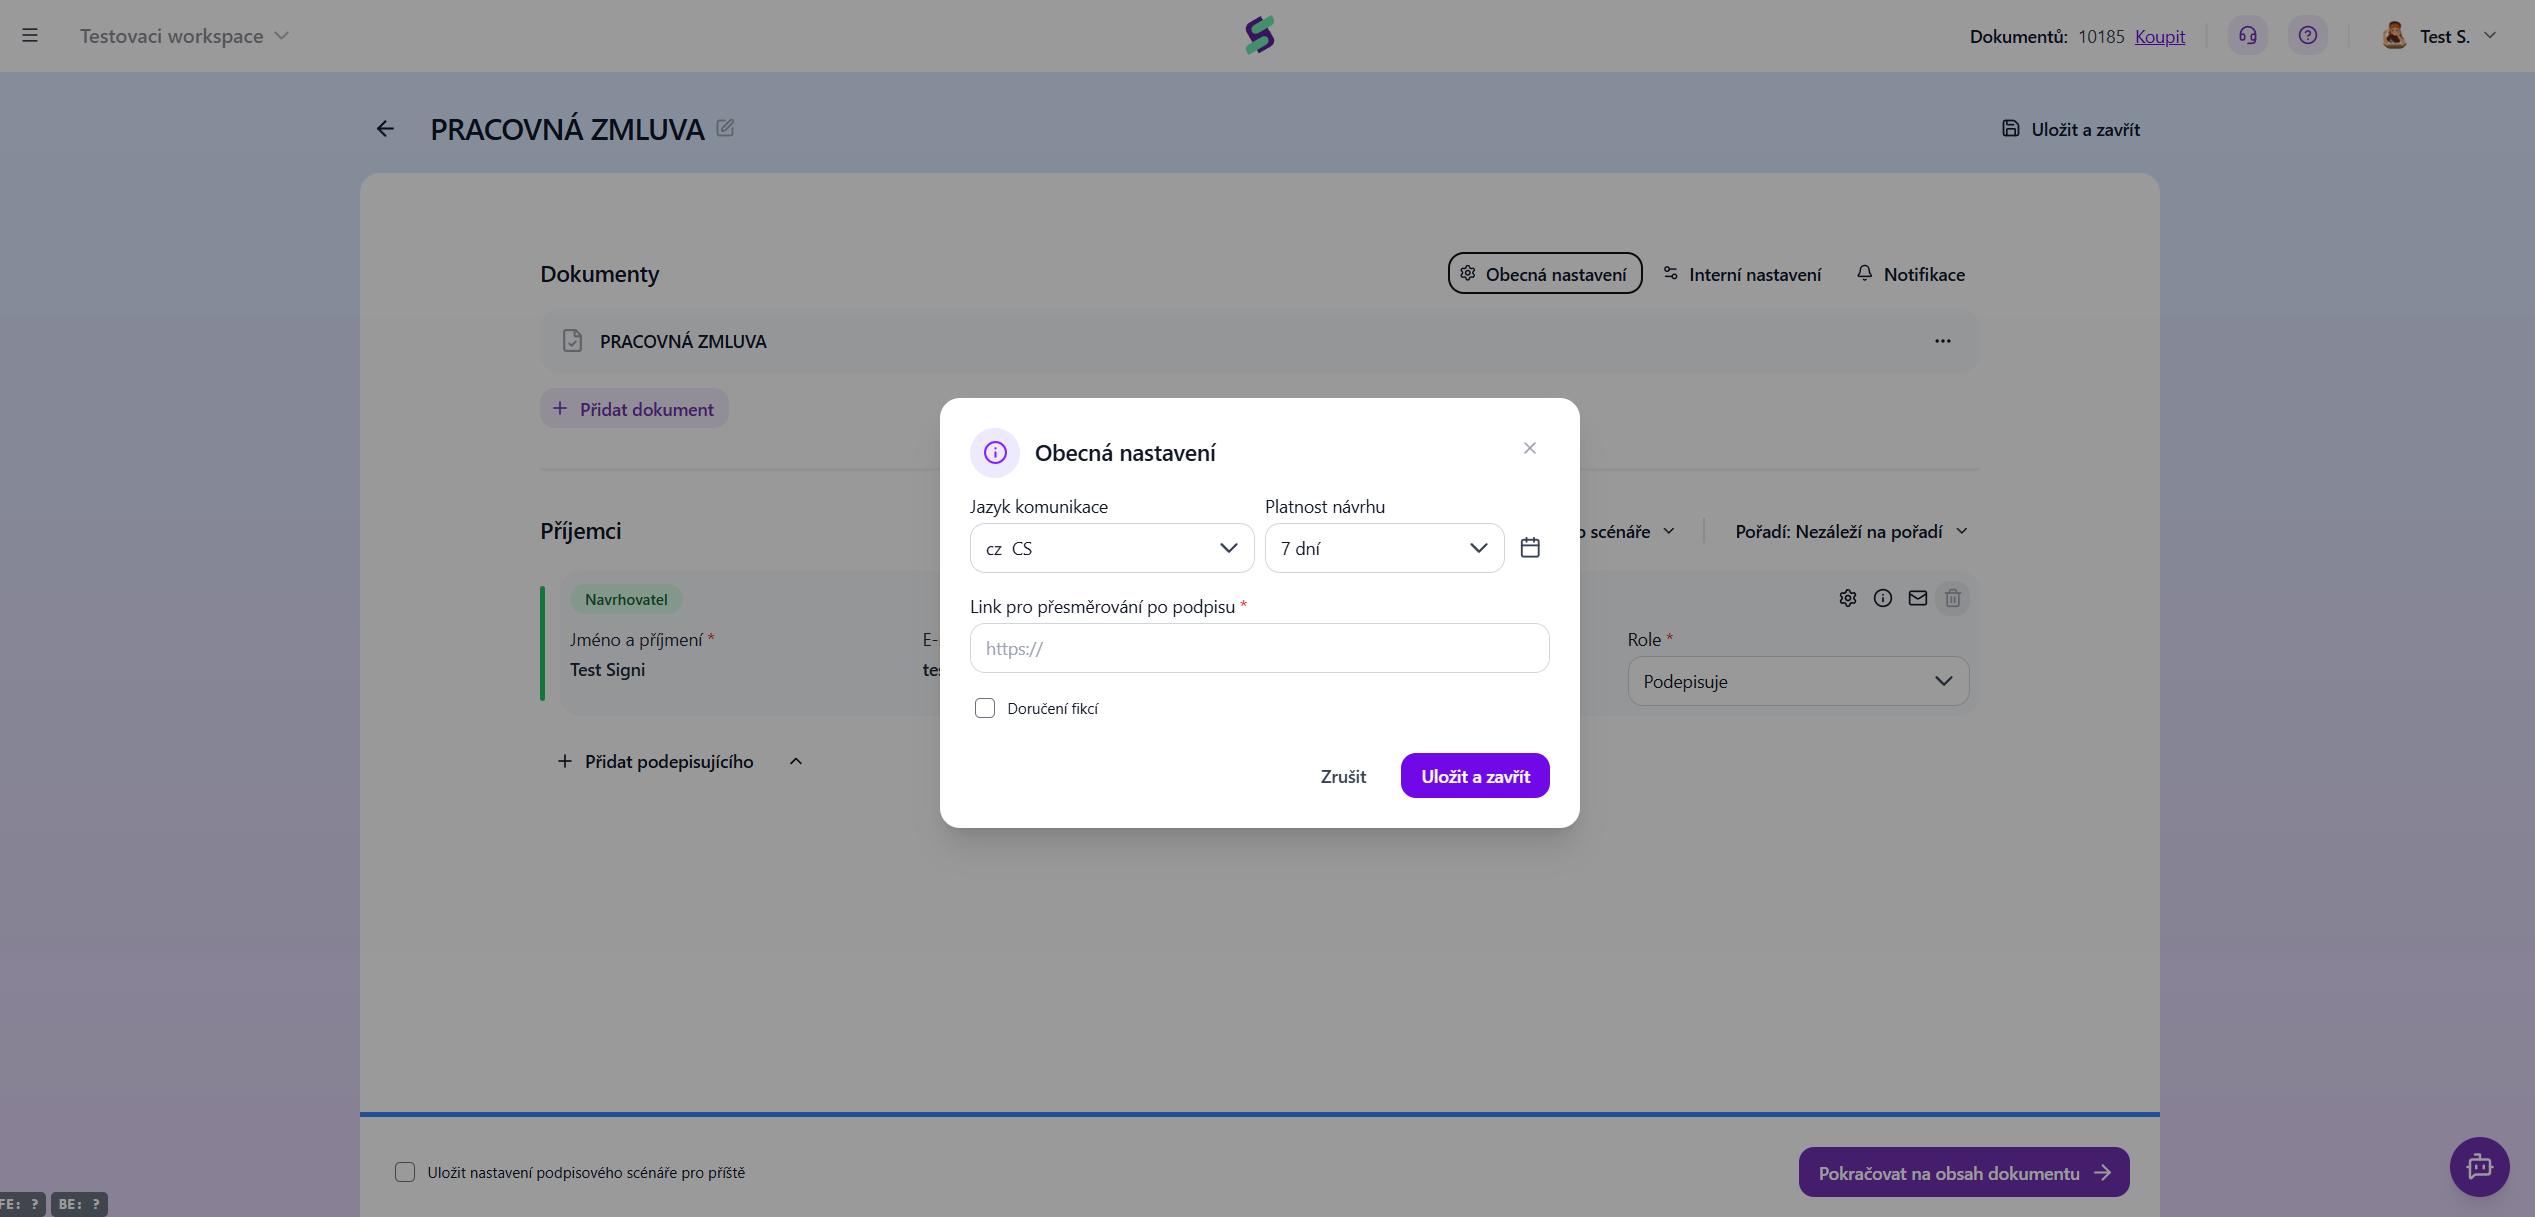
Communication language - using this button you can set the language in which we will send notification e-mails and SMS messages.
Draft validity - here you can set the validity of the link for signatories in calendar days, or click the calendar icon to select an exact date.
Redirect link after signing - here you can set which web page the signatories should be redirected to after signing.
The Internal settings button:
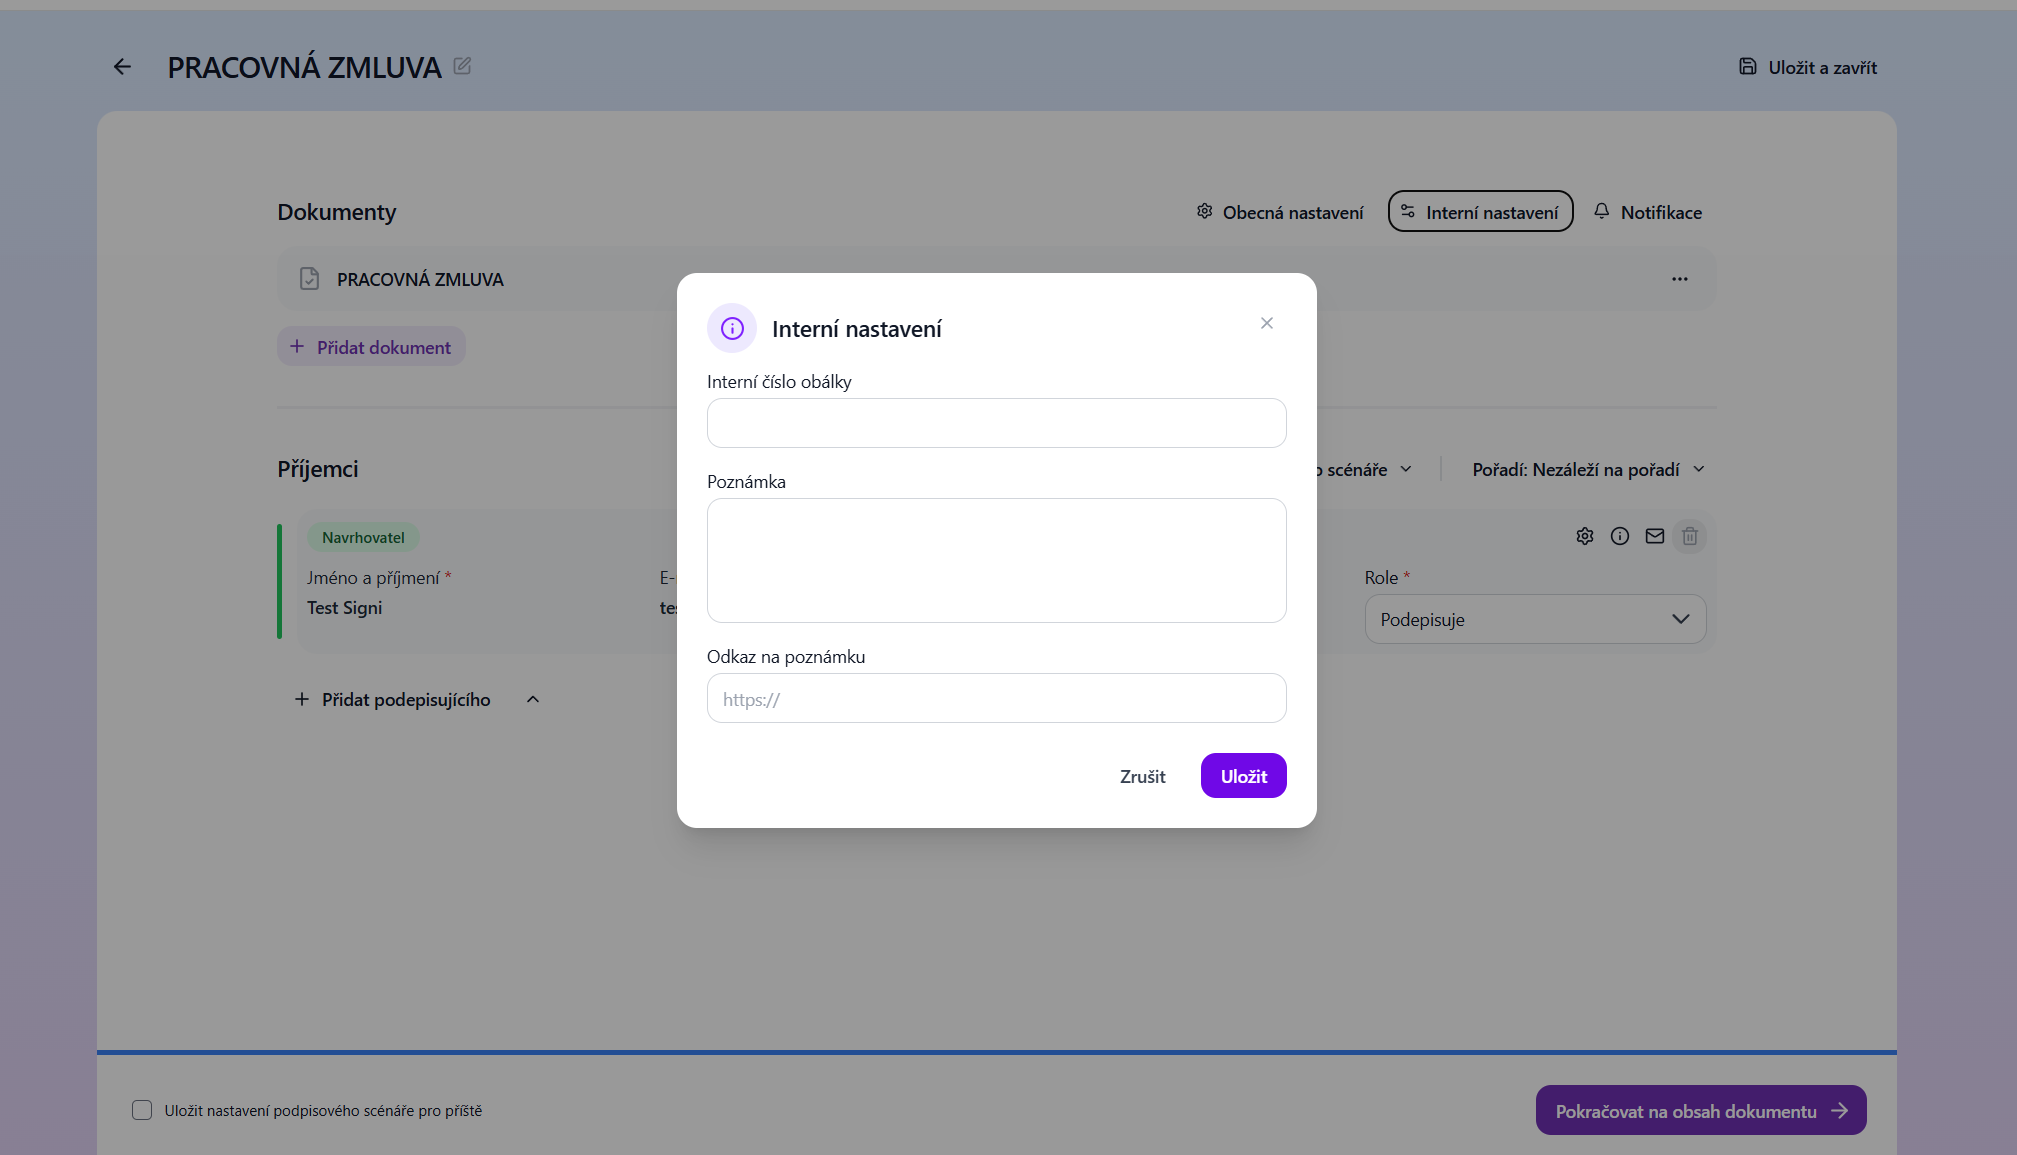
Internal envelope number - the document number field is not mandatory and serves for your internal numbering. The number can contain any number of digits and letters.
Note - here you can set an internal note for workspace members.
Link in note - here you can enter a link that will be displayed as a note when the document is opened.
The Notifications button:
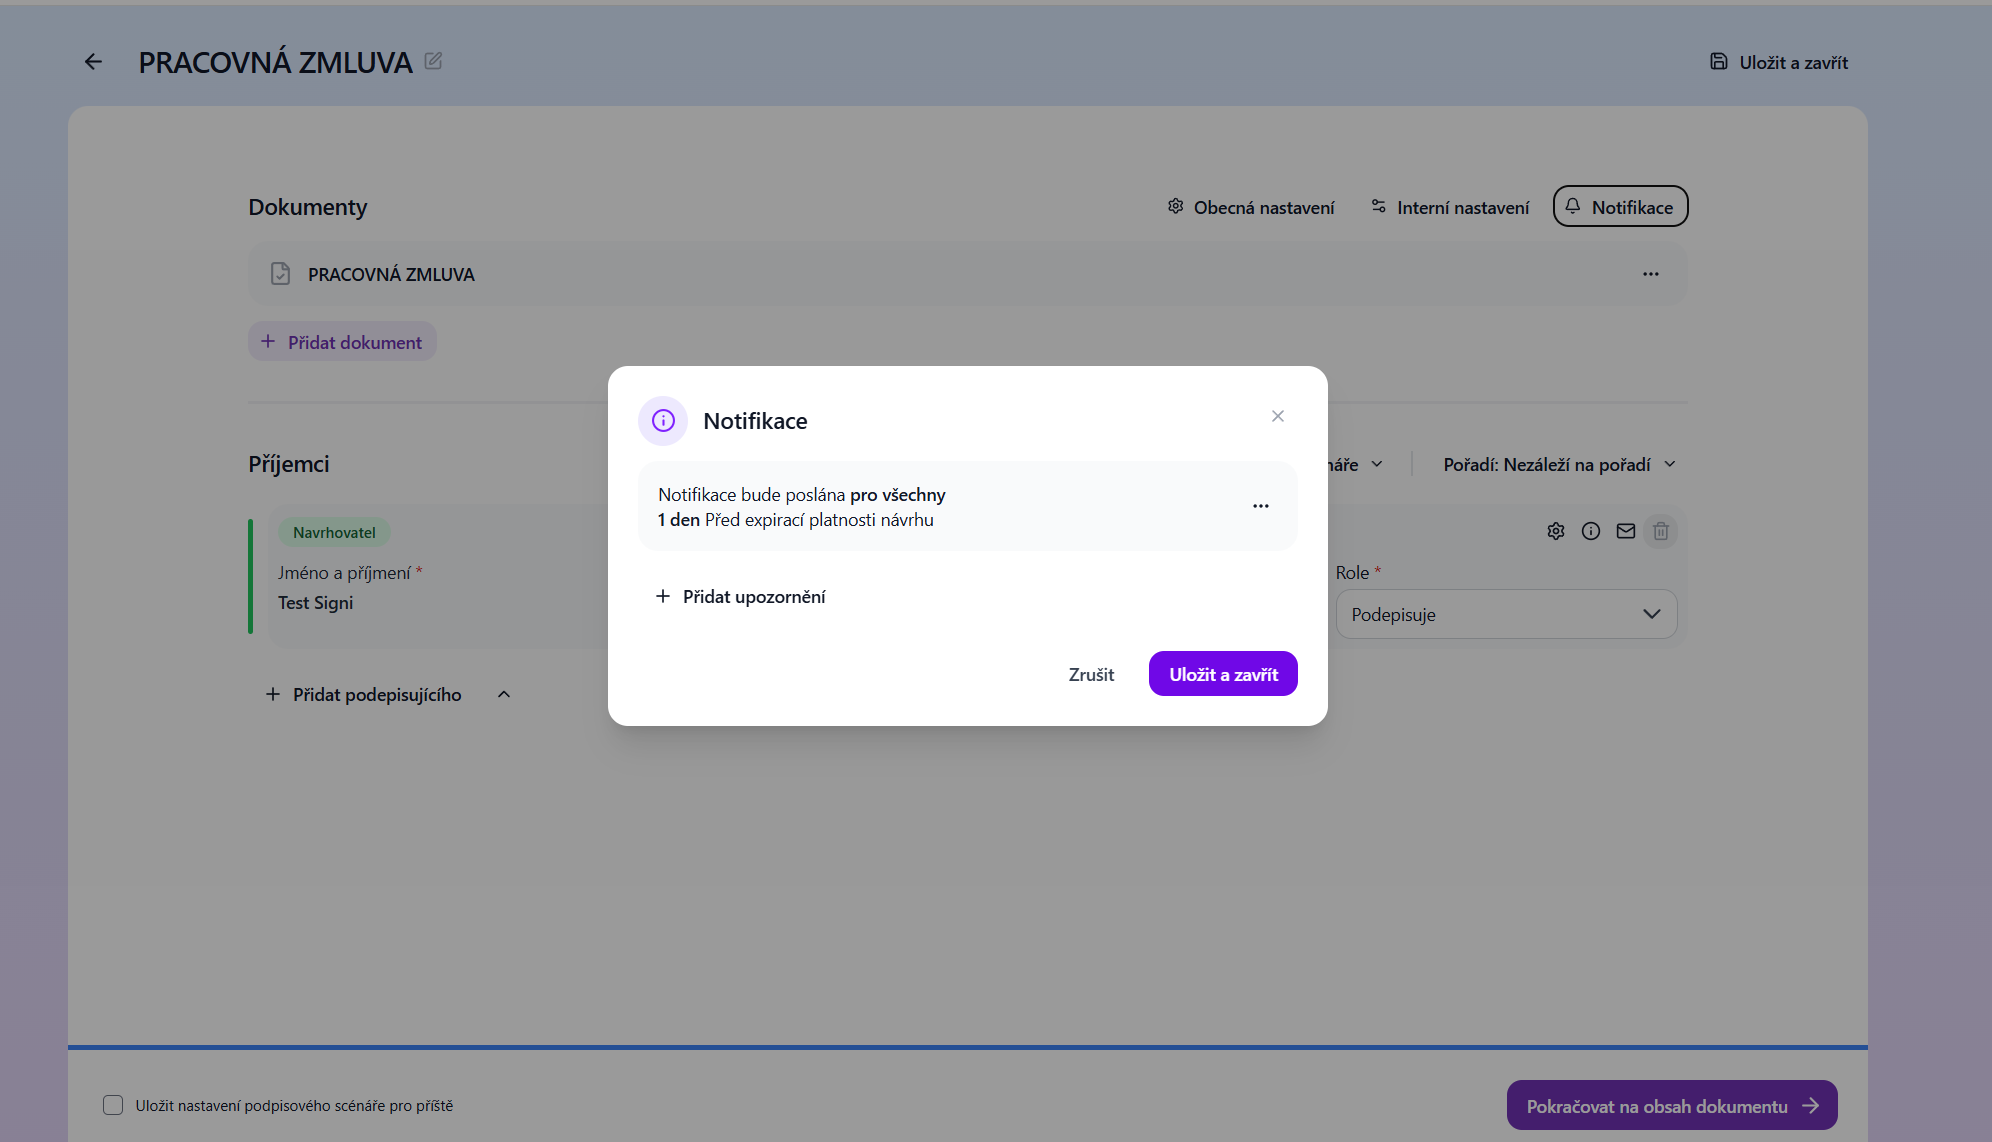
In this section you can set how often you want to send reminders to signatories.
The last button in this section is the Add attachments button; using this button you can upload attachments to the document.
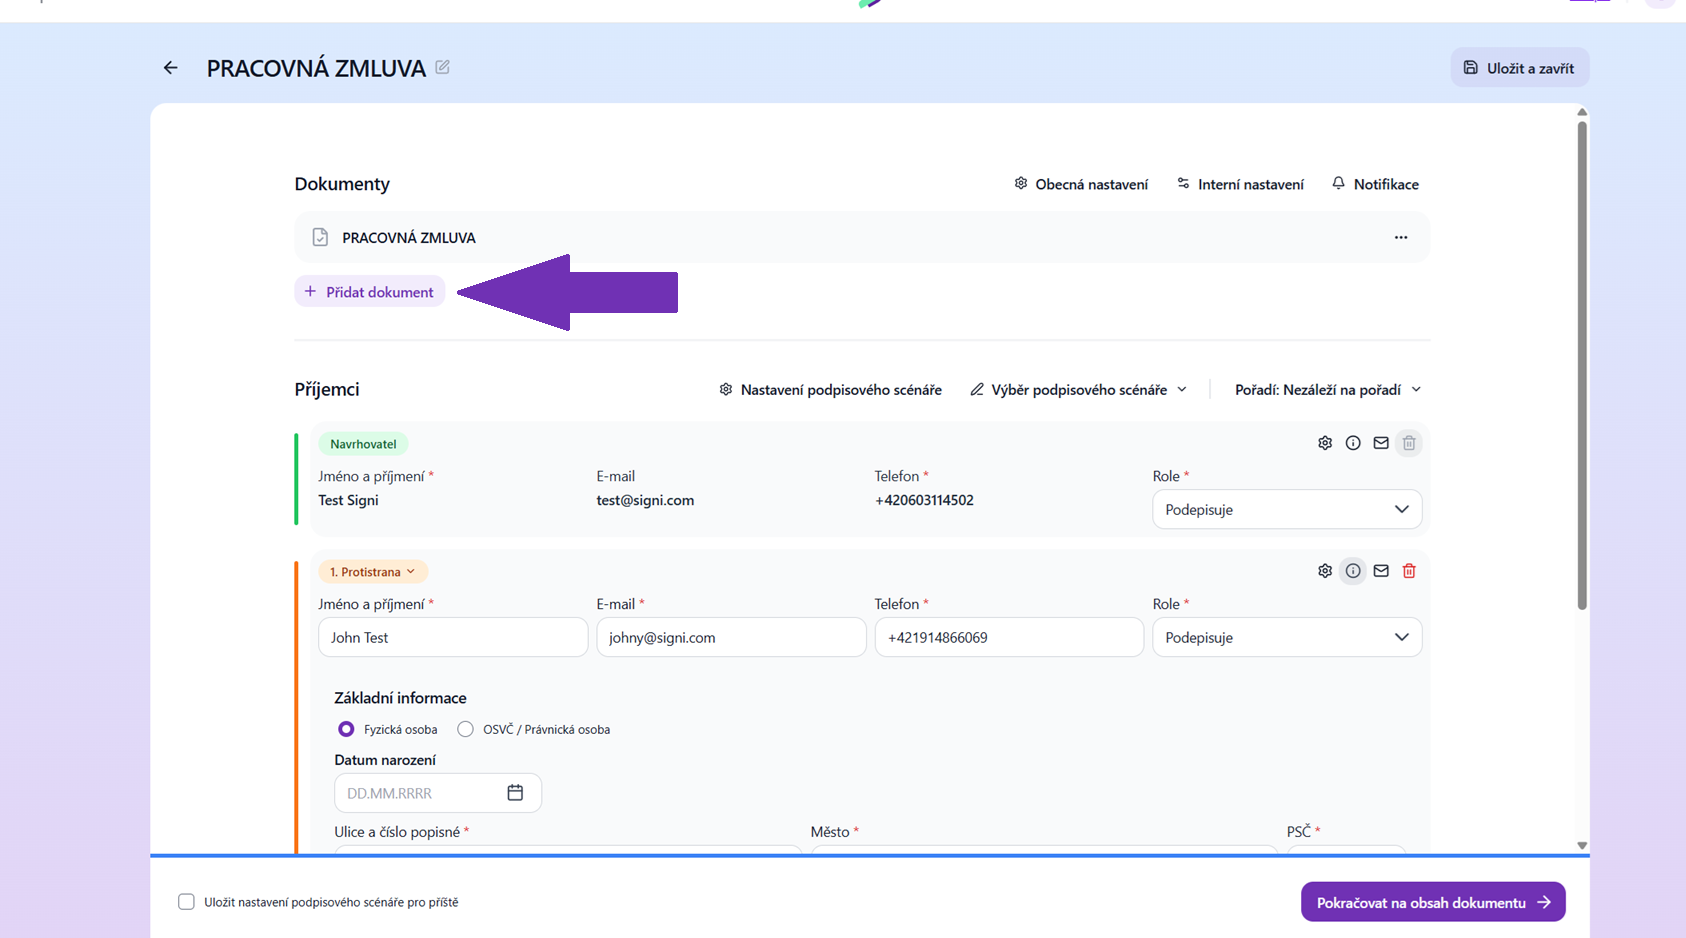 You can conclude the document on a single device, meaning that both you and the counterparty will sign on your tablet, smartphone, or PC. In that case, check the Signing on one device option (one of the paid features), which you will find under Signing scenario settings. More information can be found in the chapter Signing on one device
In this section you will also find, for example, a button for detecting placeholders, or the option to have the document locked after signing (without locking, the document can be signed again).
The next section is called Recipients, where you can select proposers and counterparties or signing roles - Signing groups (roles) in Signi
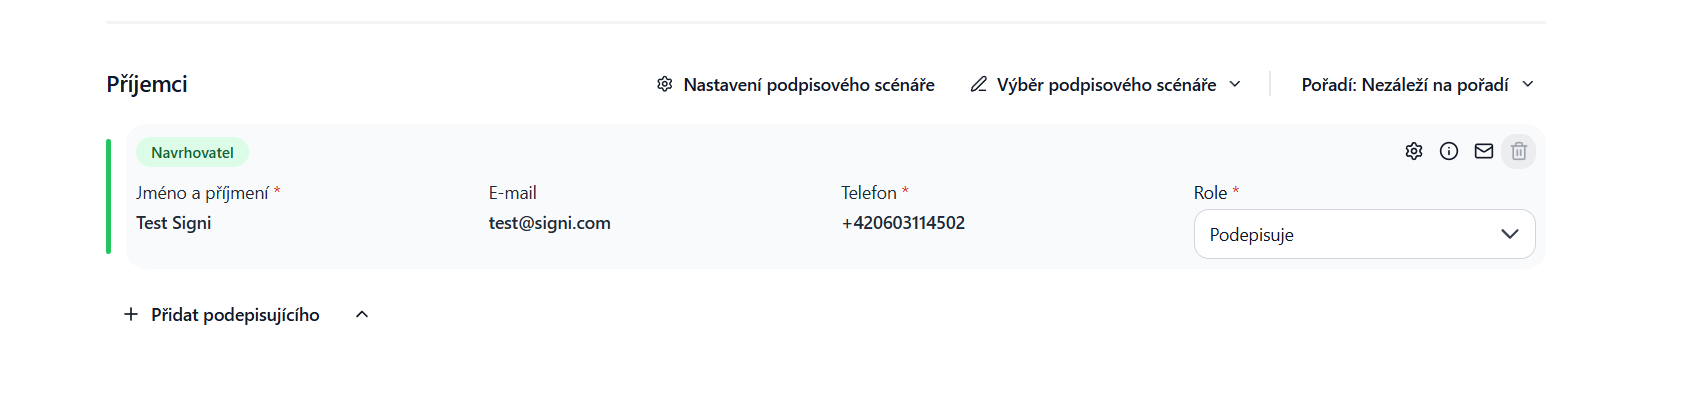
If you have invited other team members into your workspace and granted them signing rights, you can select one of them as the proposer instead of yourself.
Envelope: As soon as you click on the envelope, an option appears to write a personalized message for each user. You can copy the message for everyone using the "copy message for others" button.
If you need to add multiple proposers to the signing scenario, you must use the arrow next to the Add signatory button.
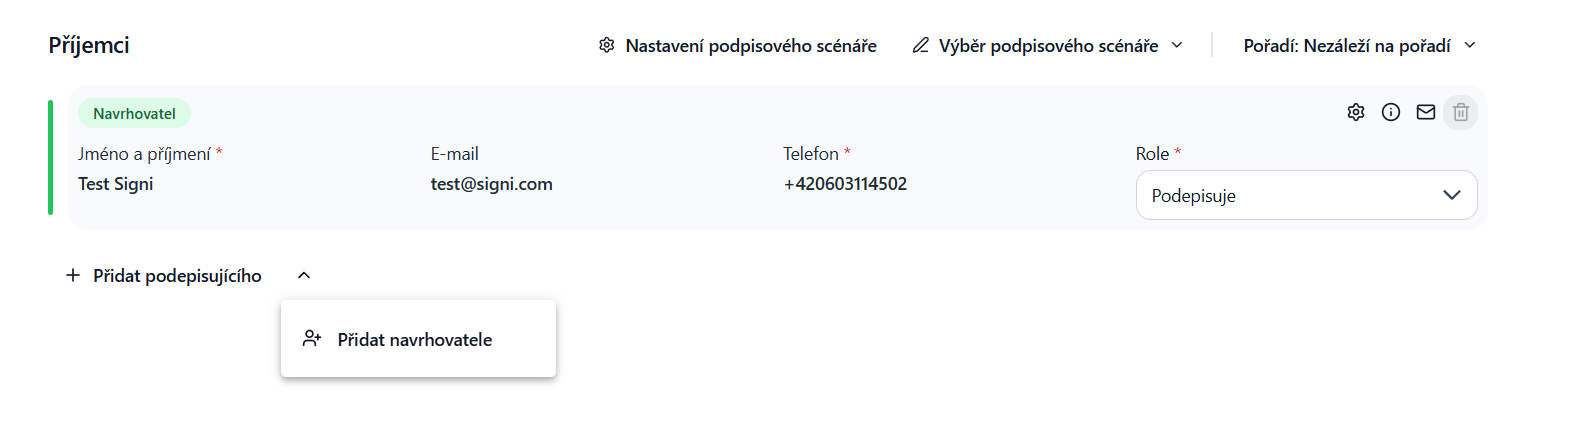
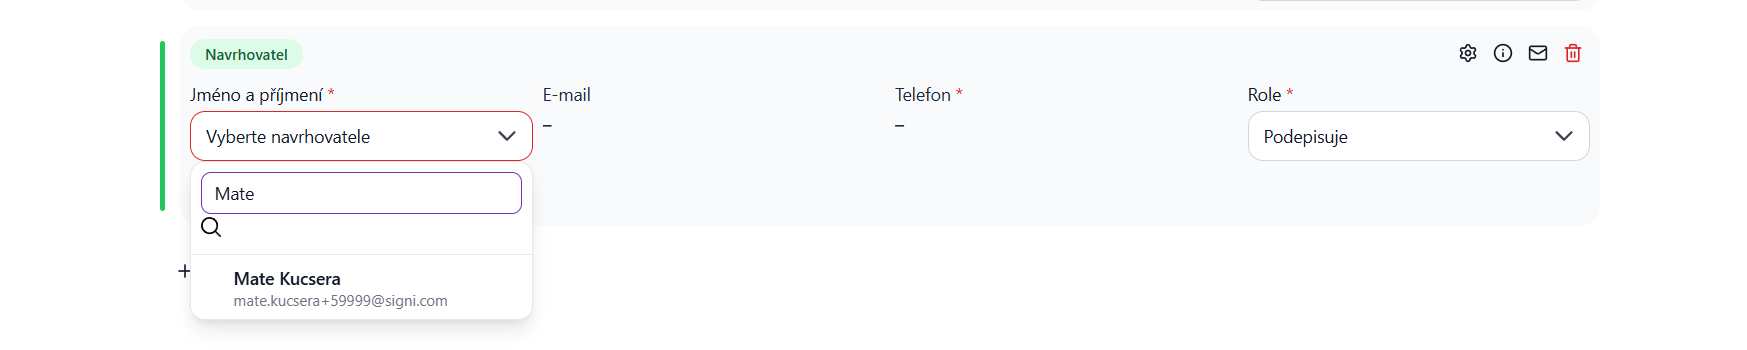
Next, continue by selecting the counterparty, by clicking the Add signatory icon. The drop-down list when selecting a counterparty is active only if you already have some contacts saved, or you have already sent a document. This is where your history will be recorded.
If you are about to send your first document, or if it is a new contact, you must enter the details manually.
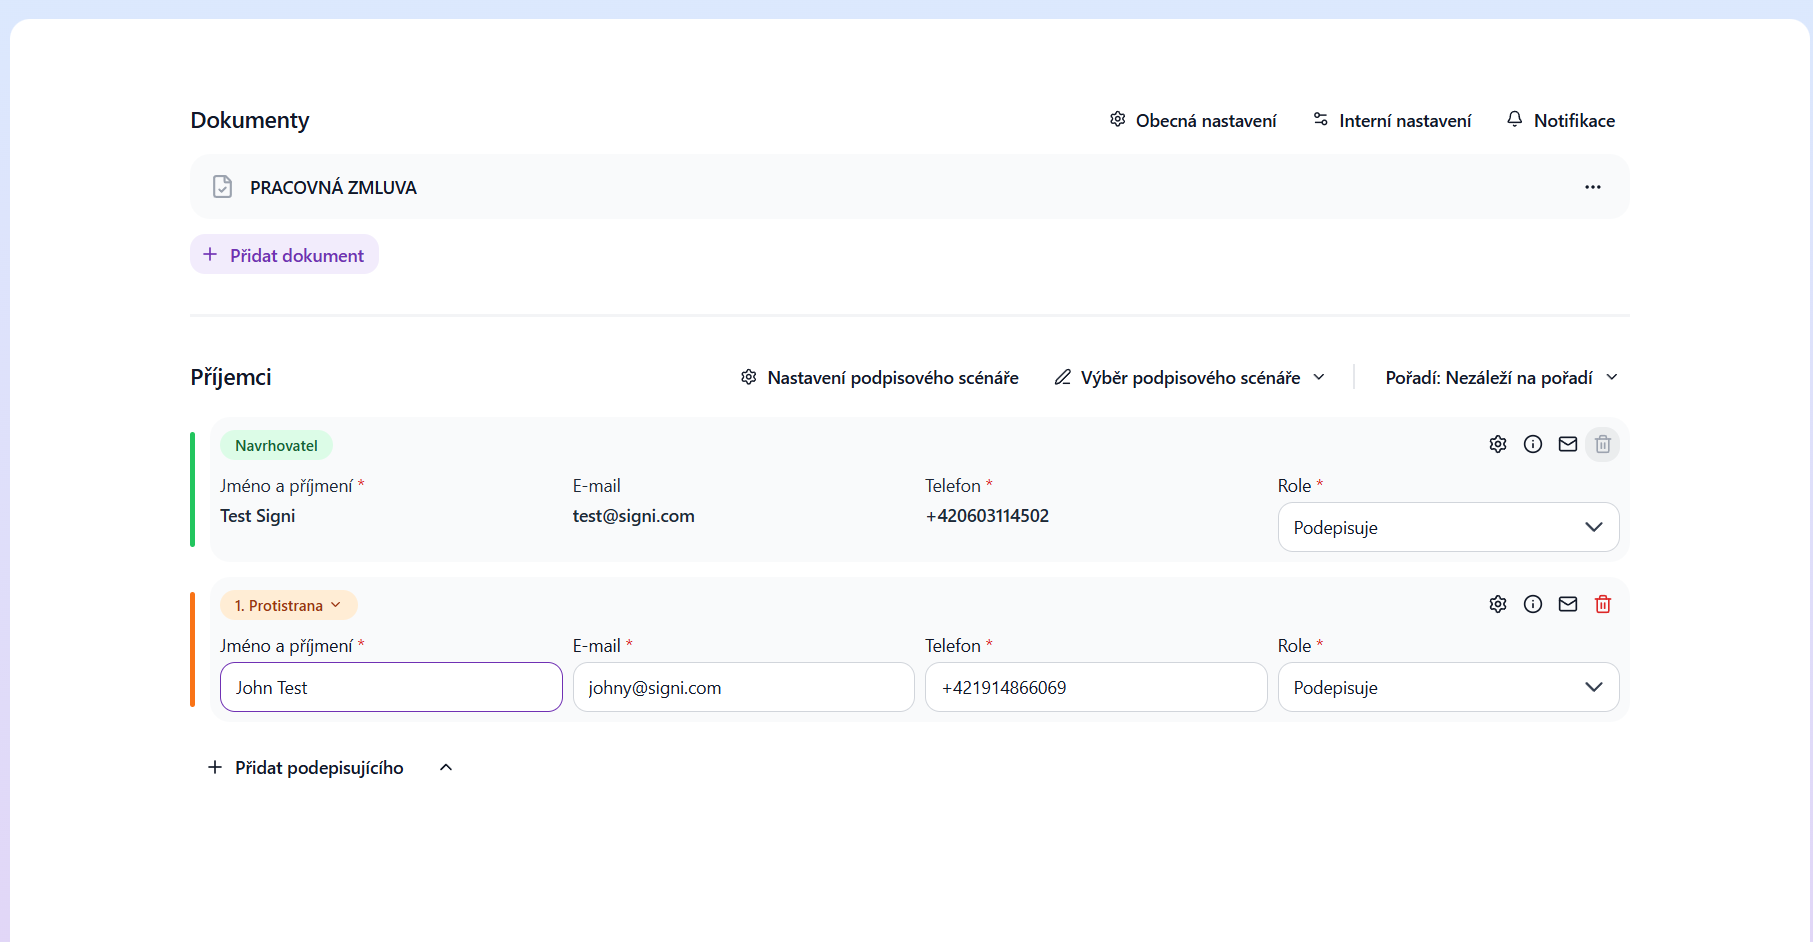 The document can be concluded with a self-employed person and a natural or legal entity.
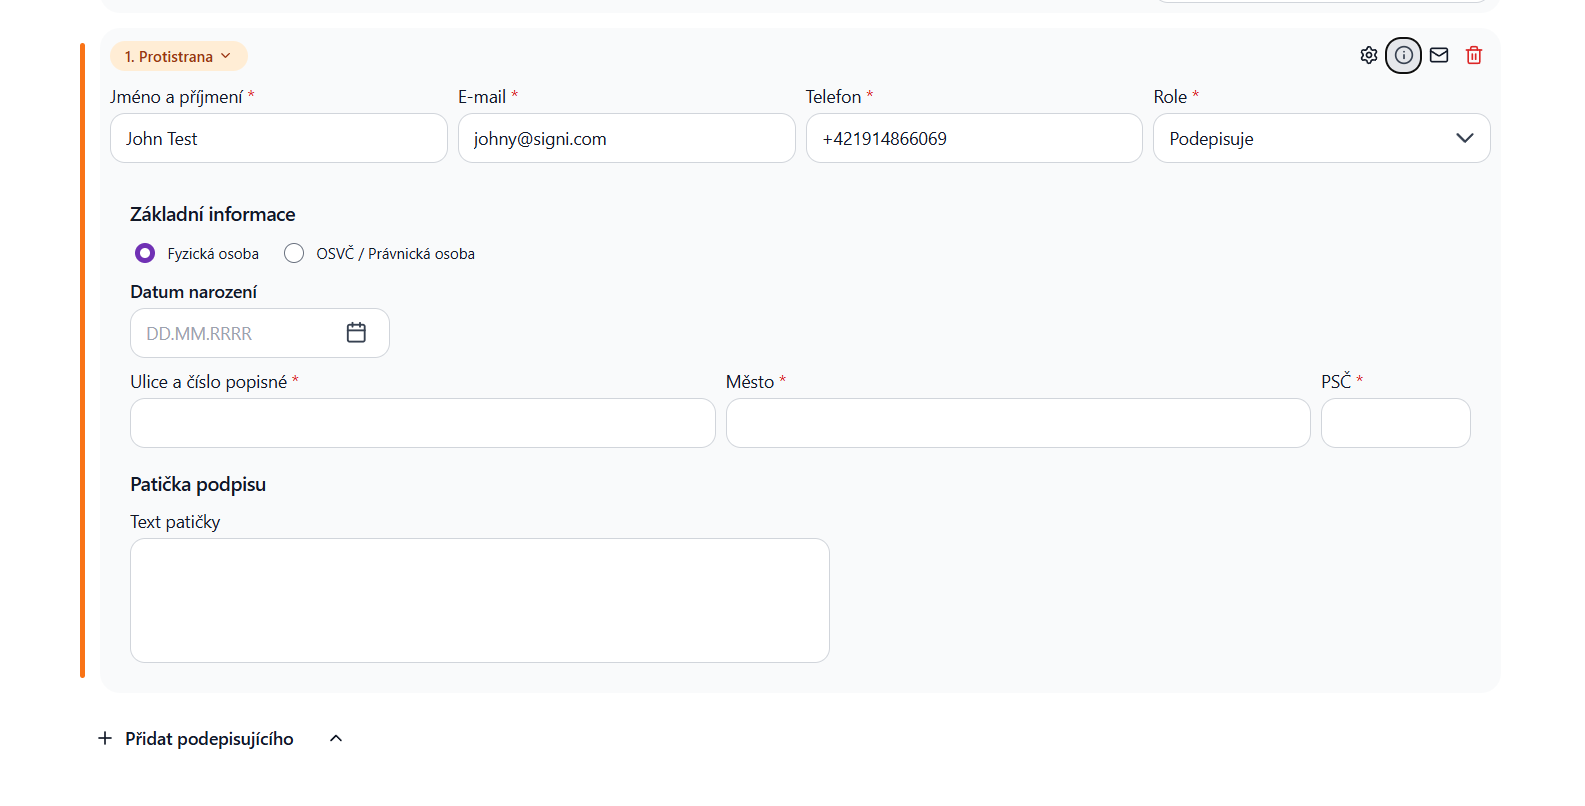
E-mail field: This field is mandatory, and to the entered e-mail address the counterparty is sent a notification about a new document draft, as well as a notification about the expiration of the document draft, and after signing, an e-mail with the signed document in PDF format is sent to this address. We recommend providing an e-mail address you have already used to communicate with the counterparty, to eliminate any doubt about ownership of and access to this mailbox.
Phone field: This field is not mandatory by default, but we recommend filling it in (otherwise the phone number will be requested from the counterparty at the moment of signing). To this phone number an SMS is sent with a notification about a new document draft, as well as a one-time PIN used for verifying and signing the document.
First and last name fields: These fields are mandatory; this is the person who will sign the document on behalf of the counterparty.
The other fields can be filled in automatically after entering the company registration number (IČ) via the ARES register. The rest of the details you fill in only in the Templates module, where these details will then be transferred directly into the document template. When uploading a finished document from a file, they are not necessary.
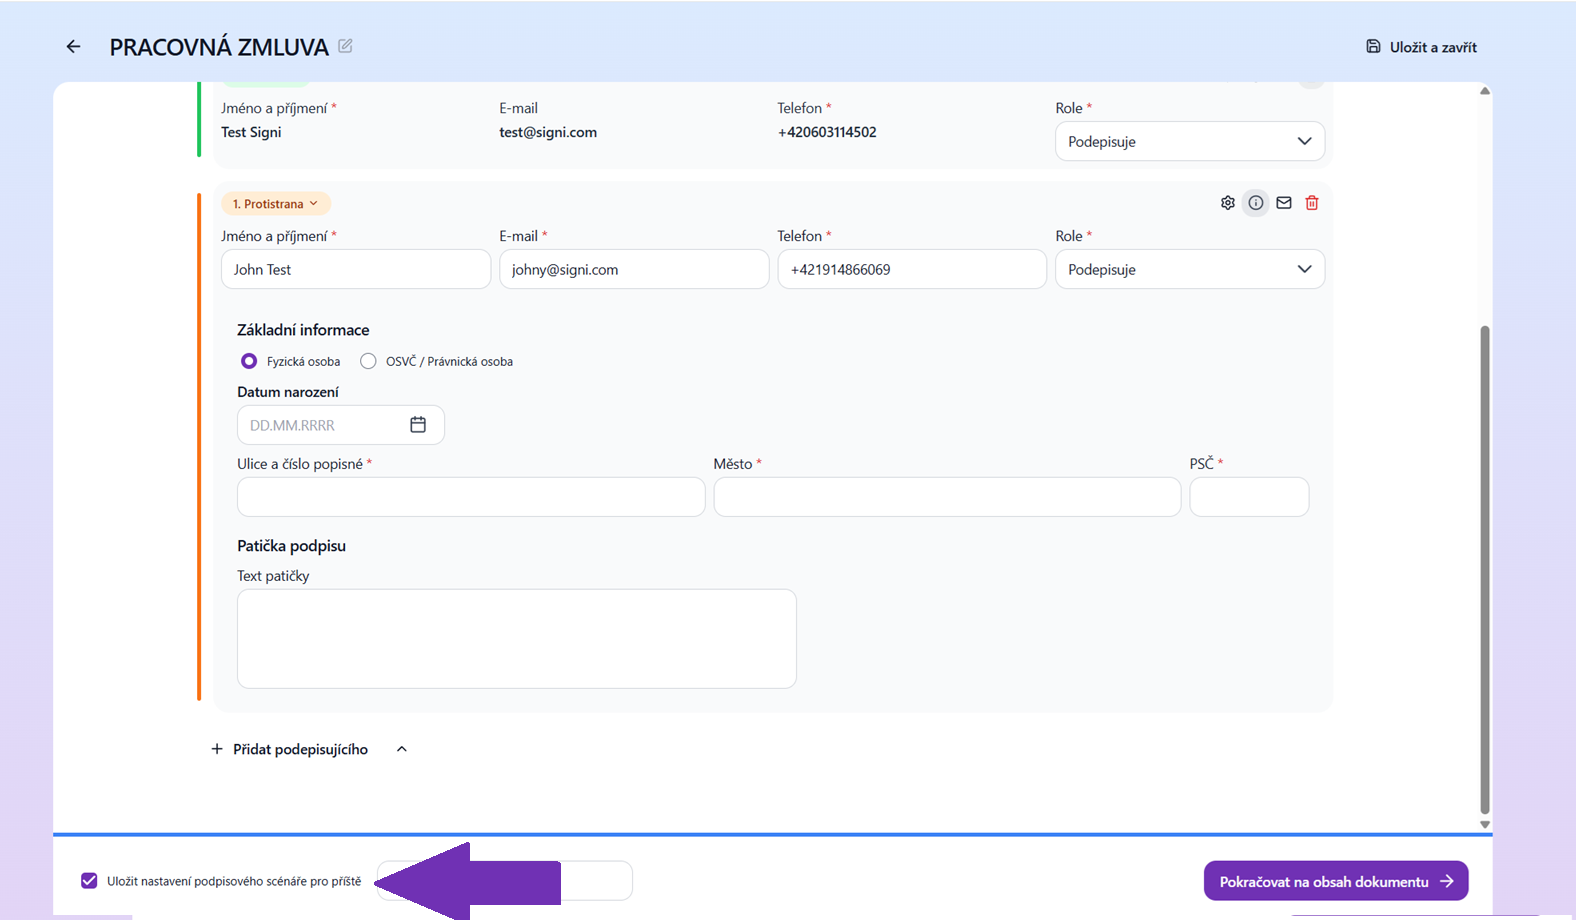
You can also save the signing scenario. If, for example, you have some approval process where the people do not change, you can save this scenario and use it when uploading another document by clicking the Select signing scenario button.
Types of signatures and whether they include SMS verification
- Signs: YES
- Signs via SMS: YES
- Approves: YES
- Signature with certificate: NO Note: The SMS code is not entered; instead, the certificate code is entered.
- Signature via BankID: NO Note: Verification takes place externally via your bank.
- RemoteSign: NO Note: Verification via the RemoteSign application is used.
- Acknowledgment: NO
Filling in data into the template
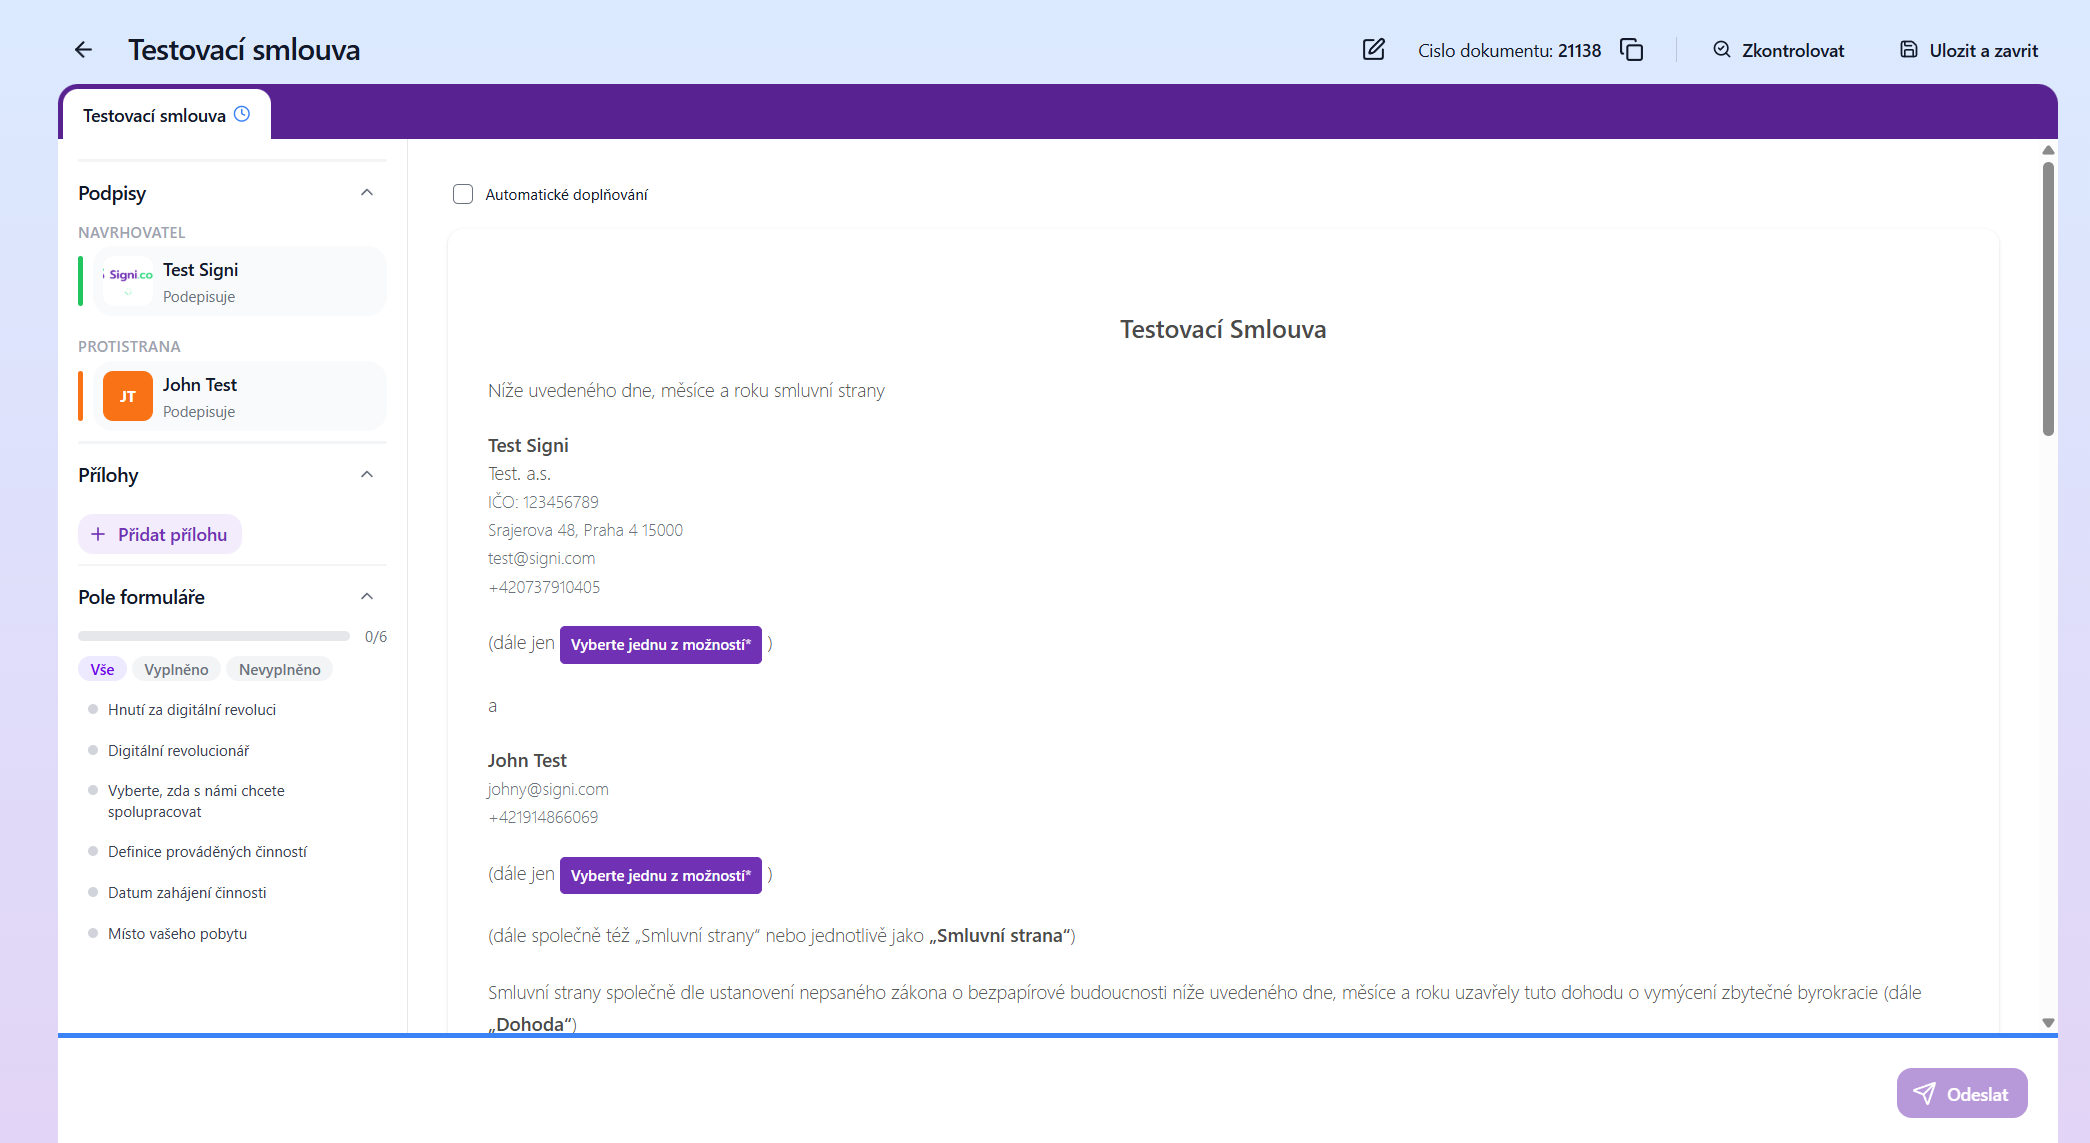
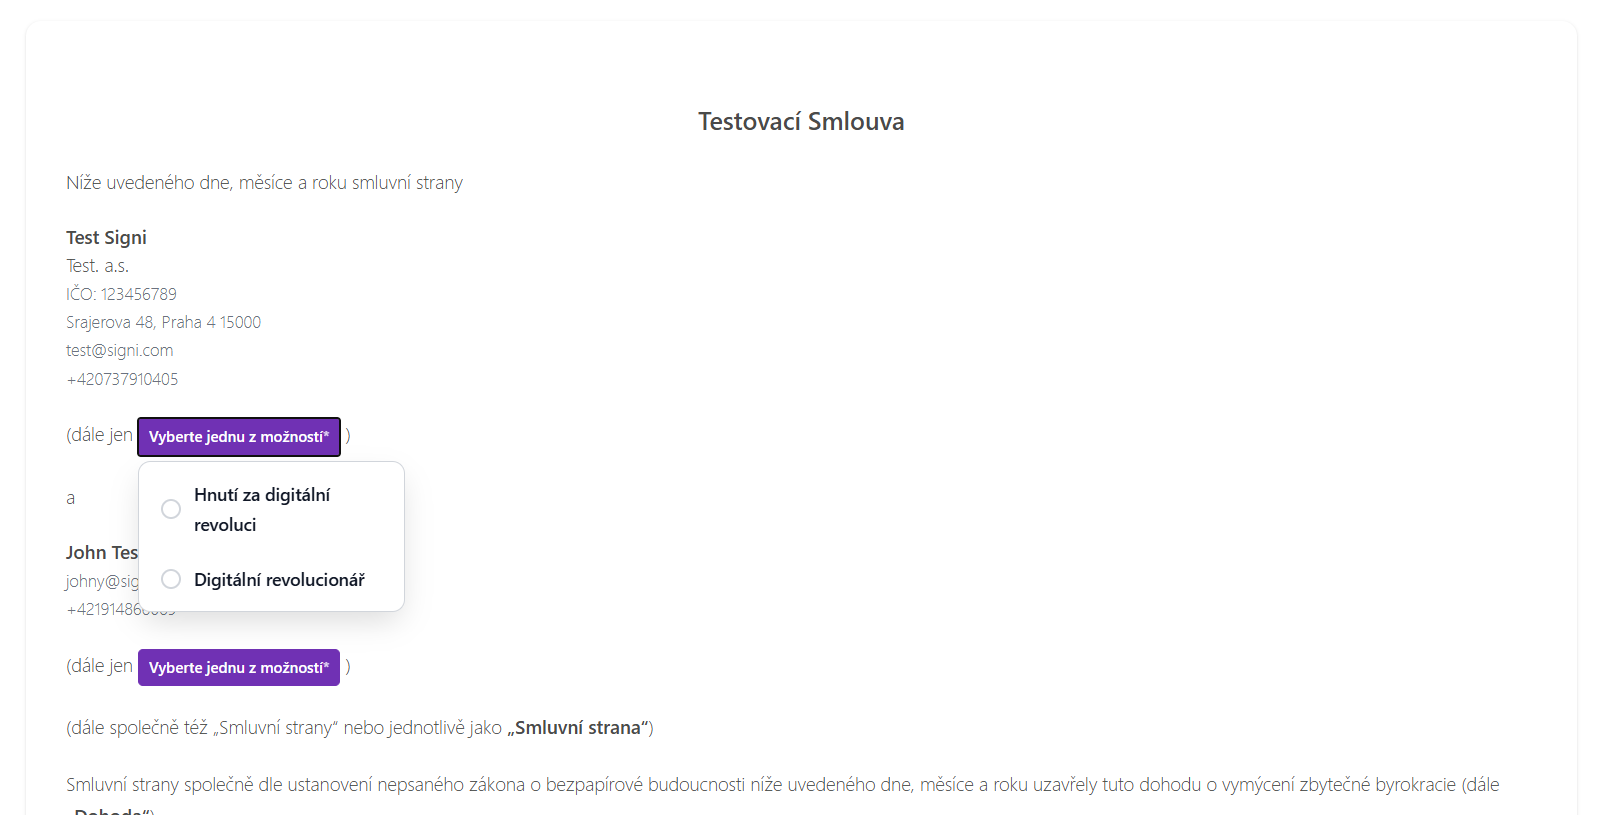
Filling in the text of the document from the template is done directly in the application. The template is prepared so that it contains so-called placeholders — marked places in the text into which you can fill various values. The places that need to be filled in are always marked in purple. In the displayed example you can see the document header. In the example below, you select what position you hold among the contracting parties.
After confirming the selected variant, the color of the block changes to green, which means that all fill-in fields in this block are correctly filled. If you want to edit the content of the block, click the trash can icon and use the Clear button to return this block to its default settings.
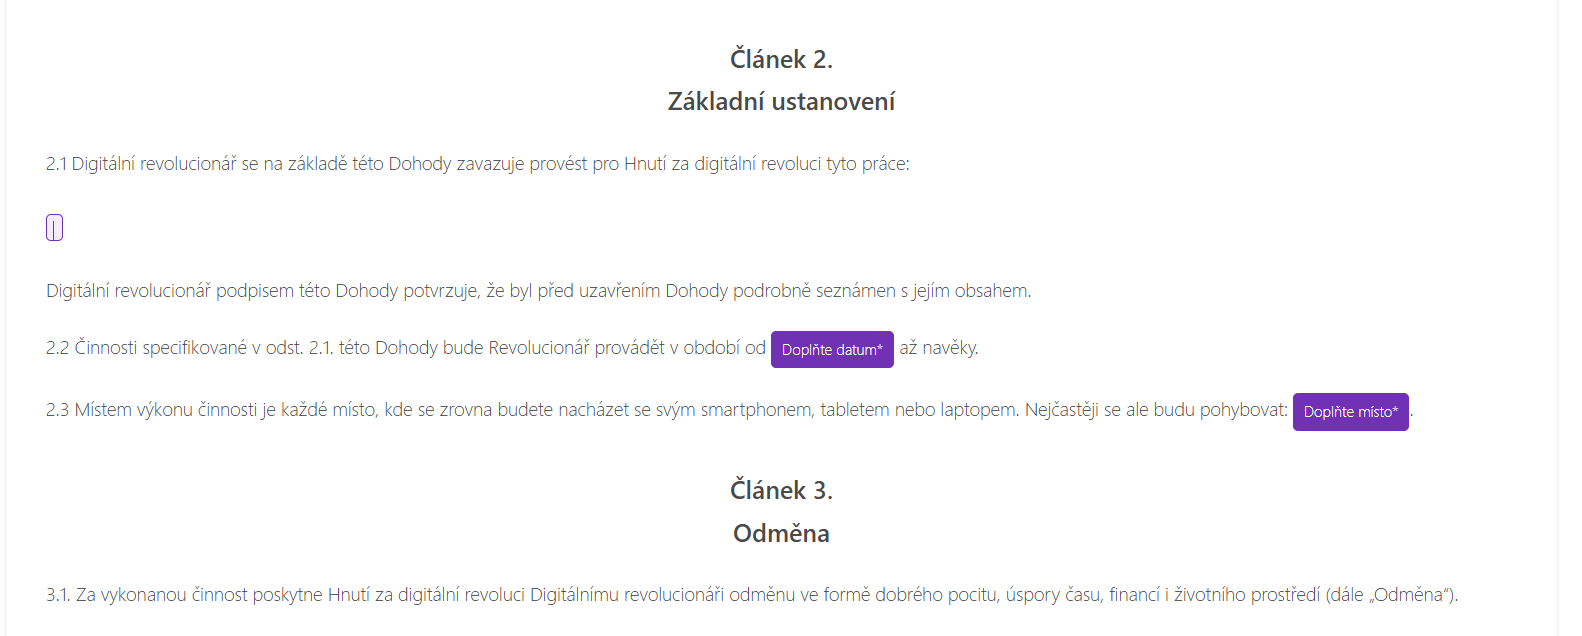
The text also contains highlighted text blocks that can be filled in. If you want to fill in, for example, the activities in the first text block, click the purple link Fill in activities.
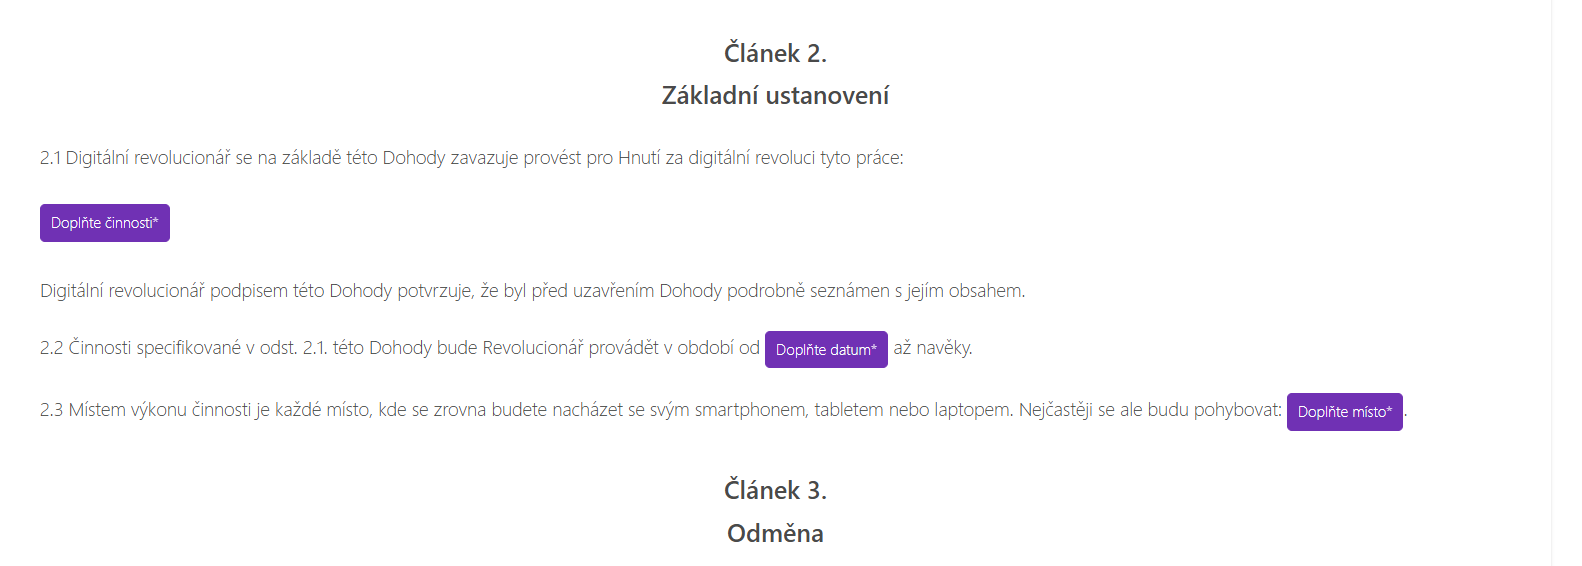
A window appears where you can type text of any length.
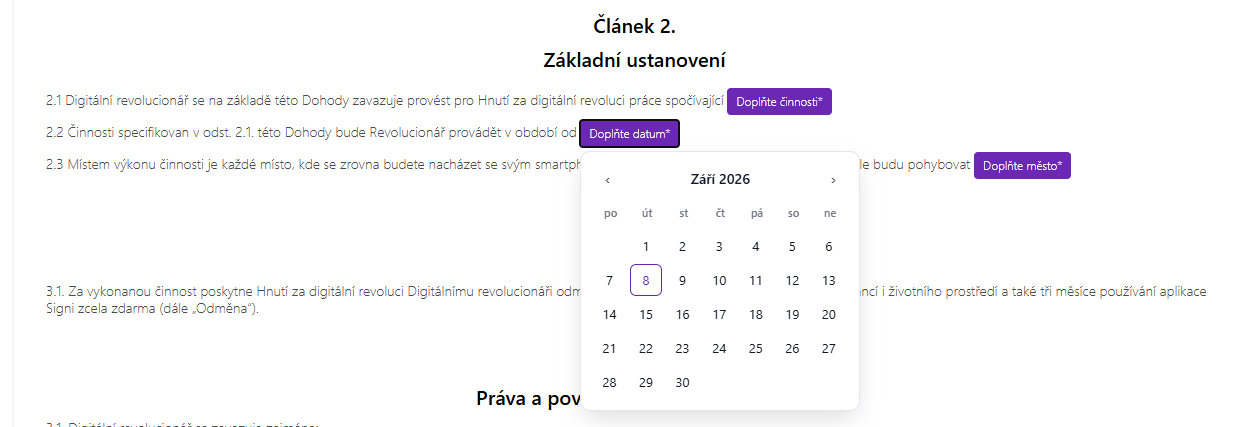
Another option is, for example, filling in a date. You select the date by clicking the calendar icon, which opens a monthly list of days with the option to switch between months. Save the selected date by clicking the Save button.
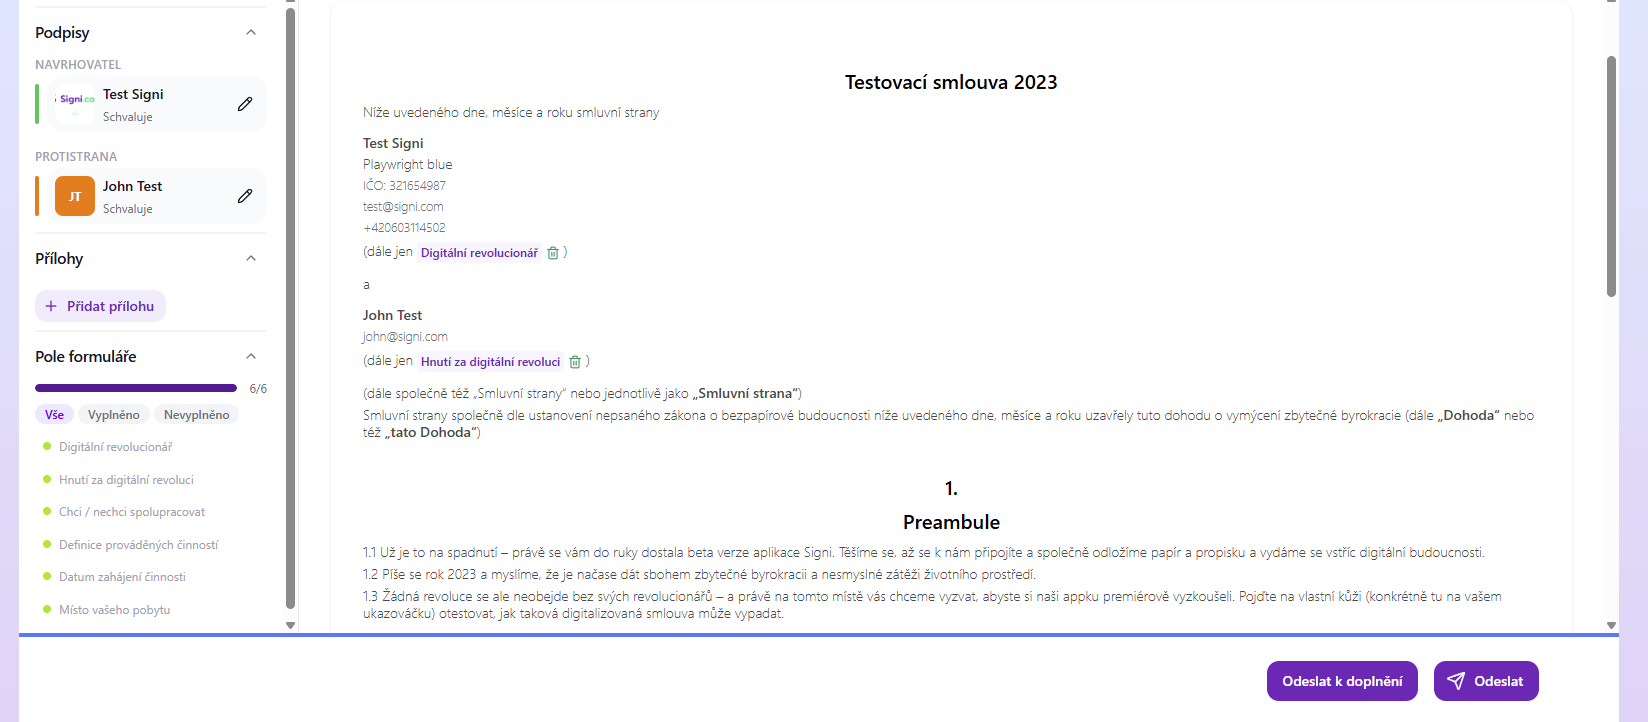
The green line shows the completion status of the individual fill-in fields. In the displayed example above, all 9 fields are correctly filled.
Sending documents for signature
If you want to send this document to the counterparty, you have two options:
- Send for completion – if the document has fields to be filled in by the counterparty, click this button.
- Send – send the document for signature immediately.
Was this article helpful?
That’s Great!
Thank you for your feedback
Sorry! We couldn't be helpful
Thank you for your feedback
Feedback sent
We appreciate your effort and will try to fix the article