In just a few minutes you'll send your first document for signing through the Signi API and download the signed PDF. All you need is a terminal and the curl command — no programming required.
This is the simplest possible case: one document, one signer. More advanced scenarios (multiple signers, signing order, attachments, templates…) can be found later in the documentation in the Typical tasks and Examples sections.
1. Get an API key
- Log in at app.signi.com.
- In the left menu, click API and enter your password.
- Select a workspace and click Generate new API key.
- Copy the key and store it in a safe place — don't send it to anyone.
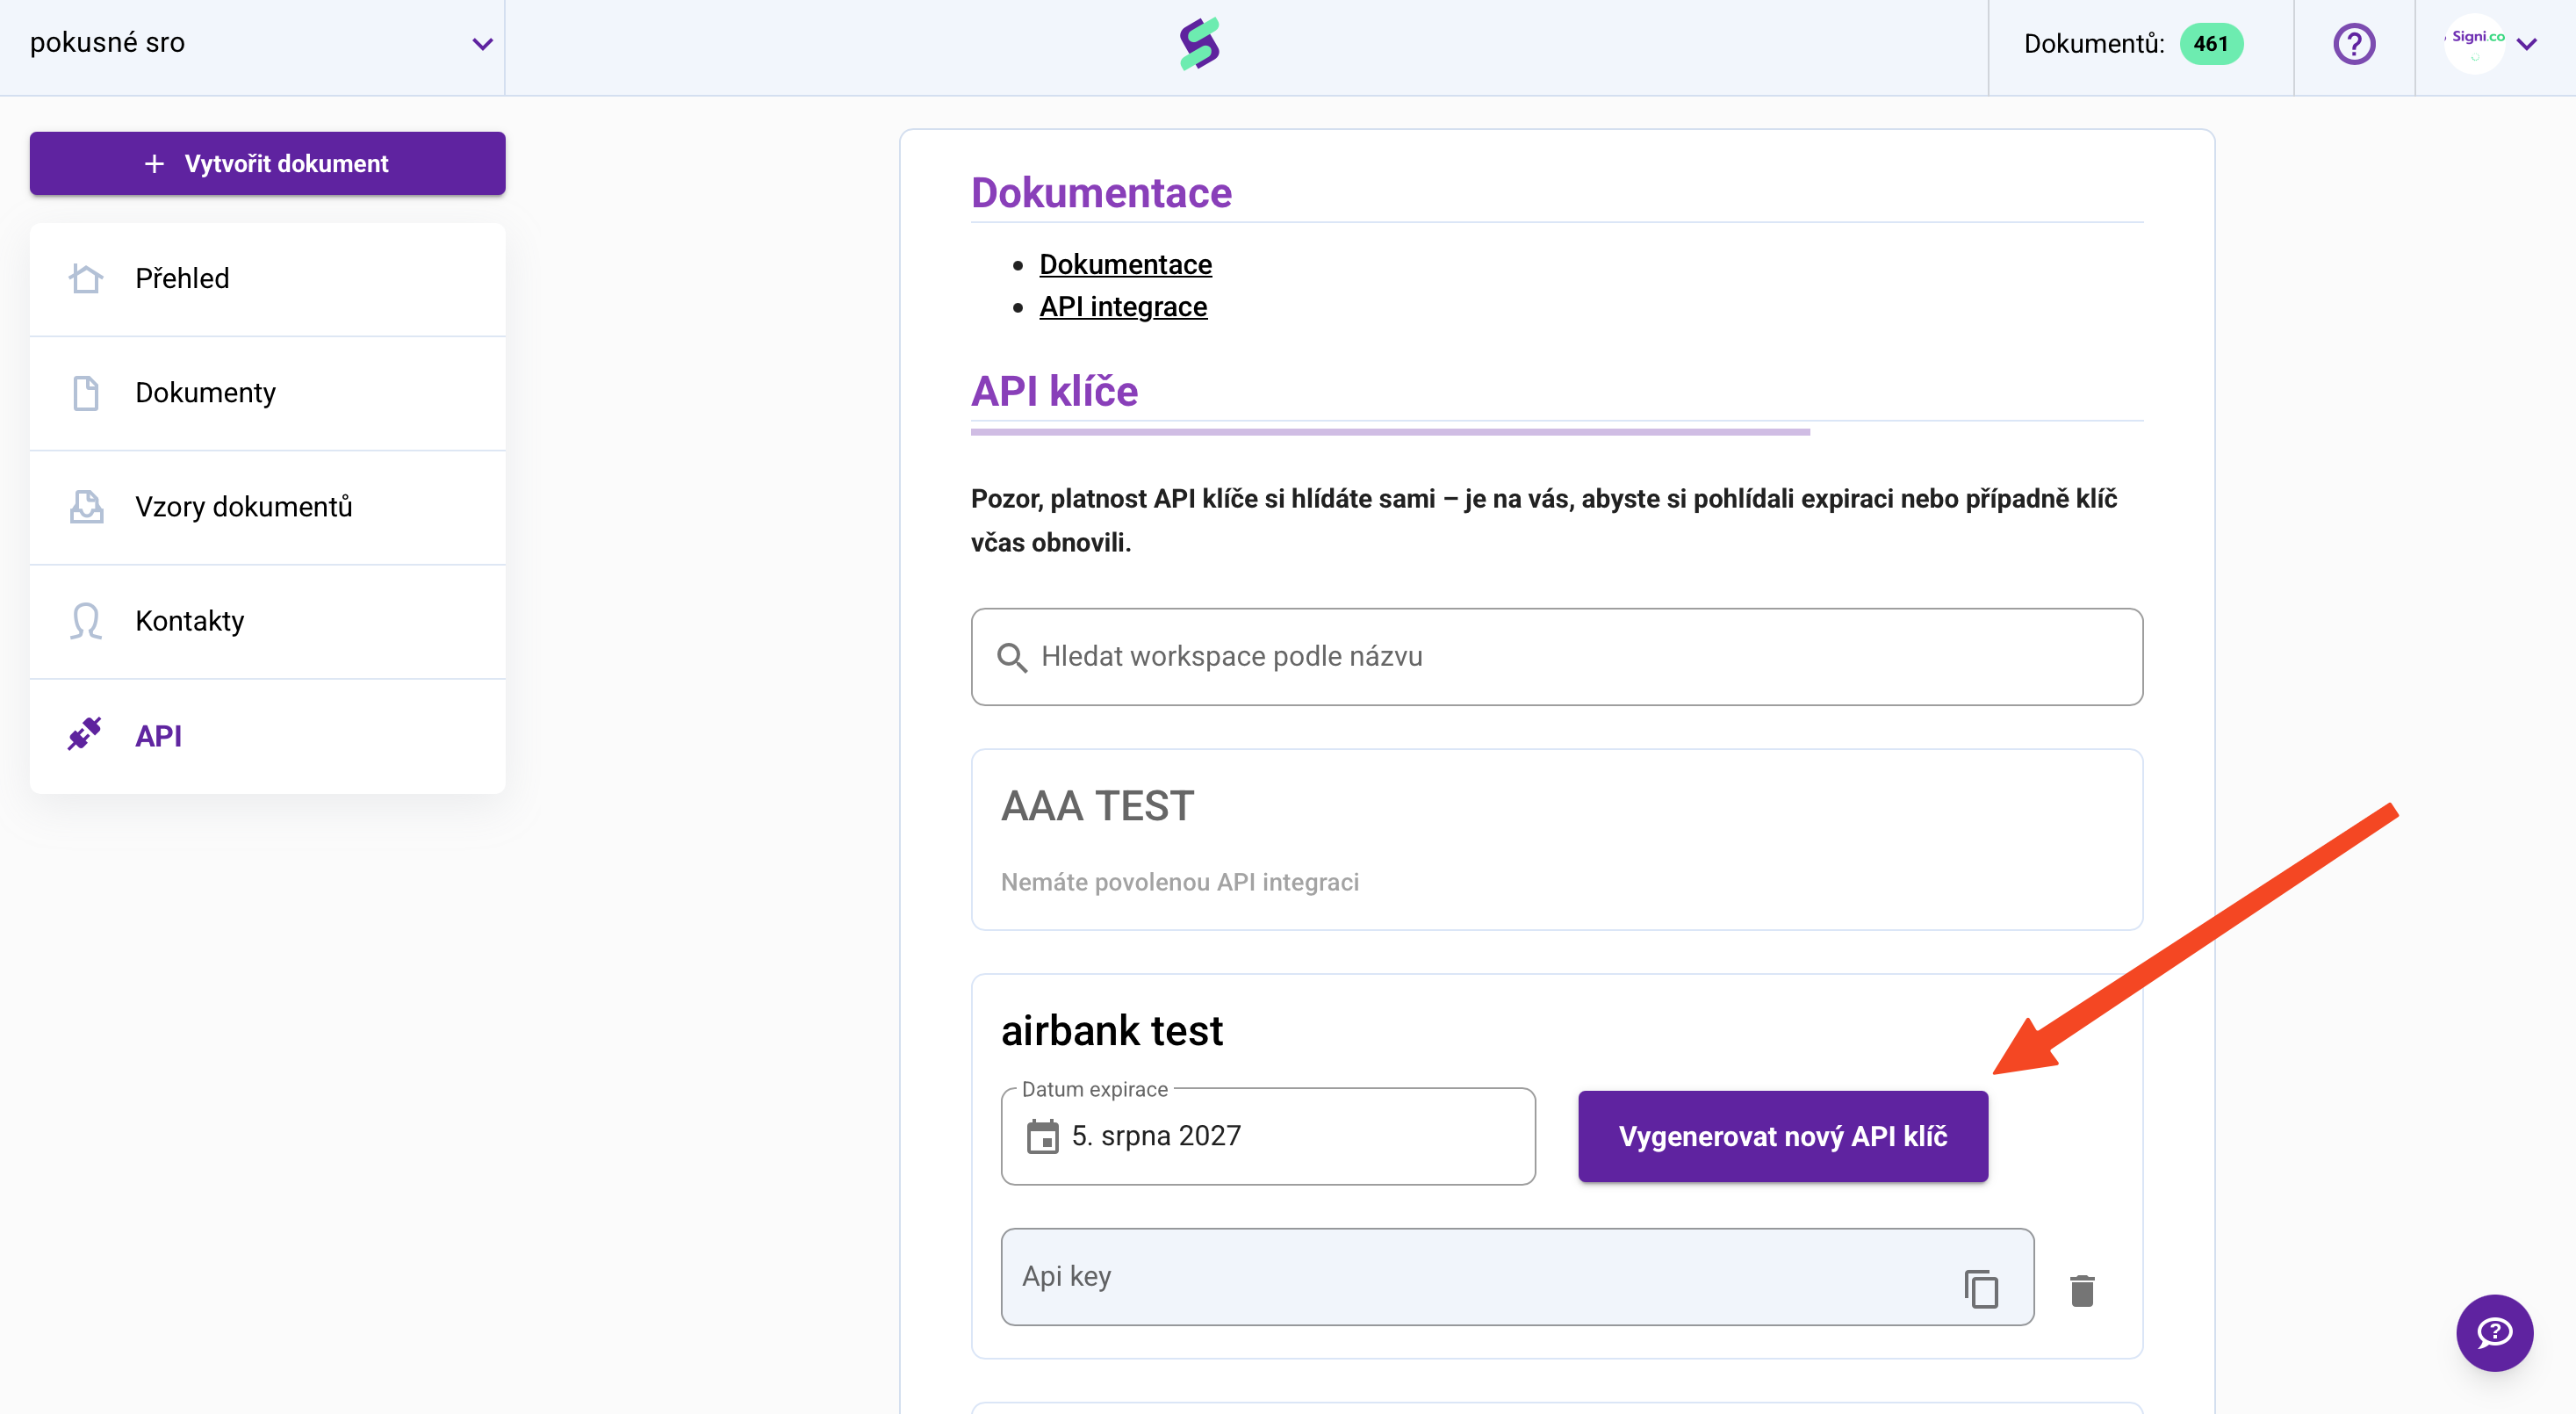
The Signi API is a paid module. If you don't see the API button, contact sales@signi.com.
2. Verify that the key works
curl -H "x-api-key: YOUR_API_KEY" https://api.signi.com/api/v1/me
Information about your account and workspace will be returned:
{ "user": { "email": "you@email.com" }, "workspace": { "id": 12345, "name": "Demo" }, "token": { "expiration_date": "2027-05-13" } }
A 401 error means the key was entered incorrectly.
3. Prepare the document and signing instructions
Download the sample files:
The JSON file specifies who signs and where:
{
    "state": "pending",
    "people": [
        {
            "is_proposer": true,
            "email": "you@email.com",
            "contract_role": "sign",
            "phone": "603123456",
            "first_name": "Mr",
            "last_name": "Proposer",
            "person_type": "legal",
            "positions": [
                { "x": "50", "y": "80", "page": 0 }
            ]
        }
    ],
    "file": "uploaded_file_key"
}
What the individual parts mean:
- people — who signs. Replace the email and phone with your own so the signing request comes to you.
Note: the email used must belong to a user who is registered in Signi, is assigned to the workspace the API key belongs to, and has the right to sign.
- positions — where the signature is placed:
xandyare percentages of the page width and height (50/80 = bottom center),pageis the page number — the first page is0. - file — the name of the field in which you'll send the actual file in the next step. Don't change it.
4. Send the document for signing
In the terminal, in the folder with the downloaded files, run:
curl -X POST "https://api.signi.com/api/v1/contract/" \
  -H "x-api-key: YOUR_API_KEY" \
  -F "data=@quickstart-dokument.json;type=application/json" \
  -F "uploaded_file_key=@quickstart-testovaci-dokument.pdf"
What comes back:
{
    "contract_id": 1234567,
    "state": "pending",
    "notifications": [
        { "email": "you@email.com",
          "links": { "contract": "https://app.signi.com/dashboard/workspace/…/documents/1234567" } }
    ]
}
Make a note of the contract_id. At that moment an email with a signing request is sent to the signer (the signing link is also in notifications). Open it and sign the document.
5. Check the status
curl -H "x-api-key: YOUR_API_KEY" https://api.signi.com/api/v1/contract/DOCUMENT_ID
{
    "contract_id": "1234567",
    "contract_name": "quickstart-testovaci-dokument",
    "state": "pending",
    "creator": { "email": "you@email.com", "first_name": "…", "last_name": "…" },
    "file": "https://…(link to the current PDF)…"
}
The status completed means everyone has signed.
6. Download the signed document
curl -H "x-api-key: YOUR_API_KEY" -o signed.pdf \
  https://api.signi.com/api/v1/contract/DOCUMENT_ID/download
The PDF with signatures is available for download once the document is in the completed state.
Where to go next
- Document lifecycle — what happens next with a sent document
- Multiple signers — a document for several people
- JSON for creating a document — overview of all fields
- Signi API — how it all works
- Complete overview of all calls (reference documentation)
Was this article helpful?
That’s Great!
Thank you for your feedback
Sorry! We couldn't be helpful
Thank you for your feedback
Feedback sent
We appreciate your effort and will try to fix the article